Paano Magtanim ng Cacao: How to Plant Cacao the Traditional Way
Paano magtanim ng cacao? Here is how traditional Filipino farmers usually plant kakaw (cacao), step by step from getting the field ready to the harvest, with the day of each step and what to change for a higher yield.
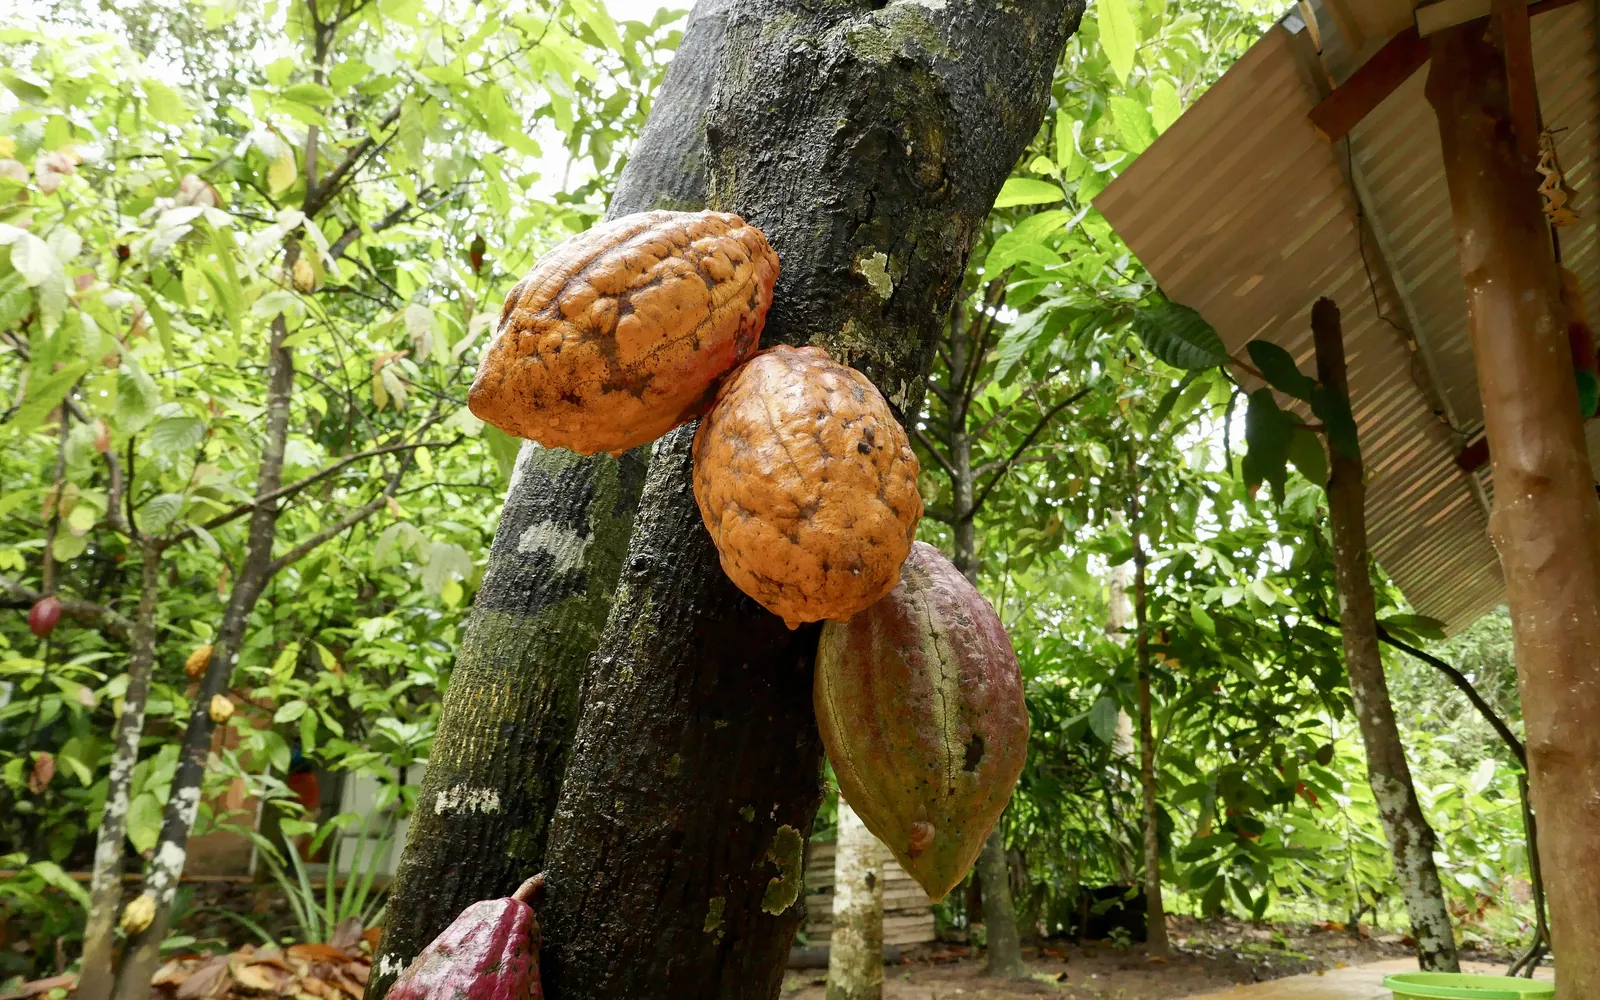
This guide shows how traditional farmers usually plant kakaw. Use it as a starting point. For a higher yield, update it: plant certified seed or clean planting material, test your soil, and follow the right spacing and fertilizer.
How Filipino growers set out cacao, most often in the shade of coconut, from a bagged or grafted seedling to the first steady pod harvest and home fermentation. It is for smallholders and backyard planters, mainly in Mindanao and the Visayas but also in Luzon farms that have shade and rain spread through the year.
Before you plant, get the field ready with our land preparation guide for fruit and plantation trees. Then choose your seed or planting material with the kakaw varieties sold here. If the leaves turn pale later on, the kakaw nutrient deficiency guide helps you find what is missing. For more on the crop, read pagtatanim ng puno.
When to plant kakaw
Seedlings go into the field as the rains begin, about May to July in Luzon and the Visayas. In much of Mindanao, where rain falls through most months, farmers plant any time the soil stays moist. Seeds are sown in the nursery four to five months before. Mature trees bear through the year, with heavier picking after the rains.
What you plant
Older farms were planted from seed of the best local trees. Today most farmers buy grafted seedlings of a known clone from an accredited nursery, or graft their own. Seed comes only from ripe, healthy pods and must be sown within about four days, because cacao seed dies if stored or dried. The rootstock seedling is grafted at two to three months, and the grafted plant is ready for the field at four to five months, with hard, dark green leaves.
Paano magtanim ng cacao, step by step
Grafted trees give their first pods at about 18 to 24 months and a real harvest from about 30 months (900 days). Trees grown from seed usually start a year or more later. The crop is ready about 30 months after planting.
Before planting (Bago magtanim)
12 months before planting: Get the shade ready
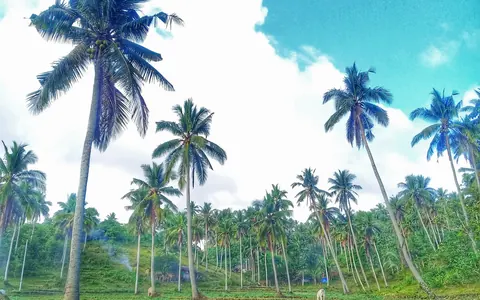
Most farmers plant cacao under coconut, which gives the light shade it wants. In open land, plant banana suckers or kakawate stakes in rows six months to a year before the cacao, so the young trees will not stand in full sun.
30 days before planting: Stake and dig the holes
Slash the weeds, stake the rows, and dig holes about 30 to 50 cm wide and deep. Mix the topsoil with compost or rotted manure and put it back into the hole.
The nursery (Punlaan)
5 months before planting: Sow seeds from ripe pods
Break open ripe, healthy pods with a wooden mallet, not a knife, and rub the beans in sawdust or coconut fiber to take off the sticky pulp, then wash them. Sow each bean about 1 cm deep in a bag of topsoil and compost under light shade, within four days of opening the pod. Tip: Throw away flat, small or already sprouted beans.
- Mix the potting soil firstDry and crumble good loam topsoil, sieve out stones and lumps, and mix about eight parts of it with one part manure and one part compost. Many nurseries here use equal parts of sieved soil, carbonized rice hull, coco peat and sand instead. Sticky clay soil makes a poor mix. Tip: Have the bags filled and waiting before you open any pod, because the seed cannot wait.
- Heat the mix in the sun1 to 2 daysSpread the damp mix no deeper than about 7 cm on a clear plastic sheet, cover it tightly with more clear plastic and leave it in the sun for a day or two. The trapped heat kills fungi and weed seed that rot young seedlings.
- Fill black bags and line them upFill black plastic bags, never clear ones that grow green slime. For plants that will stay five months or longer, use the bigger bag of about 15 by 30 cm, since small bags bend and twist the taproot. Line the bags in beds about eight bags across with a walkway of about 40 cm between beds, under a net that cuts about a third of the sun.
- Choose and open the podsuse within 4 days of openingTake only ripe, healthy pods from a strong tree with big, even seed, never green or diseased pods. Crack them with a wooden mallet, pull the beans off the core, and throw out flat, small, broken or already sprouted beans.
- Clean the beansRub the beans in sawdust, coconut fiber or sand to strip the sweet pulp, wash them in clean water and let them drain on a tray or sack in the shade for a few minutes. Tip: Many nurseries also give the clean beans a quick fungicide dip before sprouting them.
- Sprout them on a damp sackup to 4 daysLay the beans in one layer on a clean, damp jute sack out of the sun, wind and rain, and cover them with another damp sack. Look every day and take out the beans that show a small white tip, planting them right away. Throw out whatever has not sprouted by the fourth day, and any bean whose root has grown long and curly.
- Plant root tip down10 to 14 days to come upPoke a hole about 1 cm deep in each bag and set the sprouted bean in with the white root tip pointing down, leaving about half the bean above the mix. Water with a fine spray. The seedlings come up in about 10 to 14 days.
- Pull out the poor onesFrom about the second week, remove seedlings with twisted stems or bent necks, very slow growth, or white or very pale leaves. Expect to throw out about one in ten, so plant more seed than the plants you need.
3 months before planting: Graft the young rootstock
At two to three months, side graft or patch bud each seedling with budwood cut from a high yielding, healthy clone. Keep the grafted plants under a plastic tent and extra shade for about three weeks, then let them rest before moving them into the open nursery.
- Check the rootstock age2 to 3 months from sowingSide grafting is done on rootstock about two to three months old and about 20 cm tall. Patch budding waits until the stem is about as thick as a pencil, usually from about three months. Water the bags fully the day before.
- Cut budwood the same dayCut bud sticks from healthy, high yielding clone trees that are not worn out from a heavy crop. For grafting, take greenish brown wood just below a flush whose leaves have hardened, with live buds. Wrap the sticks in damp paper, keep them in the shade, label the clone and use them within a day or two.
- Trim the rootstockJust before side grafting, cut the rootstock leaves back to about a third of their size and pinch off the growing tip. For patch budding, cut off only the tip.
- Set the graft and tie itWith a sharp knife used for nothing else and wiped with alcohol, cut a thin slit near the base of the stem and slip in a bud stick of one bud with a third of its leaf. Wrap it tightly with grafting tape or plastic twine so it cannot slip.
- Keep them in a tent for three weeks21 daysPut the grafted plants under a well sealed tent of clear plastic, or in big plastic bags for a few plants, so the air stays humid. Lay an extra layer of shade net on top of the tent.
- Let them rest, then line them out10 to 15 days of restOpen the tent and leave the plants resting inside for 10 to 15 days before moving them to the nursery beds. Keep two layers of shade over them for about a month, then take one away. Water carefully at the base without wetting the leaves.
- Throw out the failed graftsRemove plants whose graft slipped or died, whose bud stayed asleep, or whose new leaves come out white or deformed. Side grafted plants are ready for the field about four to five months after the seed was planted. Tip: Patch budding needs no tent and uses older wood, but it is slower to learn and the plant needs about two more months in the nursery.
7 days before planting: Harden the seedlings
About a week before planting, turn each bag a little to break roots growing into the ground, and water the plants well for the next few days. Leave behind small, crinkled or weak plants.
- Stop feeding three weeks before3 weeks before plantingGive no fertilizer or leaf spray in the last three weeks before the plants go to the field.
- Take the shade off1 to 2 weeksAbout one to two weeks before planting, remove the shade over the plants so the leaves toughen in the open sun.
- Turn the bagsAbout a week before, twist each bag a little to snap the roots that grew through into the ground. Water well for the next few days so the plant recovers before the move.
- Sort and water before the tripLeave behind small, crinkled and weak plants and any with a bad graft. Water the bags well before carrying them to the field, and carry them by the bag, not by the stem.
Planting day (Pagtatanim)
Planting day: Plant at the start of the rains
Water the seedling, cut away the bag without breaking the soil ball, and set it in the hole at the same depth it grew in the bag, with the graft joint above the soil. Fill in a little soil at a time and press it down gently, then water. Tip: Do not plant in the dry months unless you can water.
Care while it grows (Pag aalaga)
Day 3: Mulch the base
Spread dry leaves, rice hull or cut grass around the seedling to keep the soil damp and the weeds down, keeping it off the stem.
Day 30: Fill the gaps
Replace dead or weak seedlings while the rains still last, so the stand stays even.
Month 2: Weed by hand
Pull the weeds around each tree and cut the grass between the rows with a scythe or bolo, leaving the cuttings as mulch. Farmers do this every few months, more often in the wet season.
Month 3: Remove suckers below the graft
Cut off any shoot growing from the rootstock below the graft and the upright suckers (chupons) at the base, because they steal food from the tree.
Month 4: Feed early and late in the rains
Scatter compost, chicken manure or complete fertilizer in a ring under the edge of the leaves at the start of the rains and again about three months later, and cover it lightly with soil or mulch.
Month 12: Shape the young tree
Once the stem forks, keep three to four evenly spaced main branches and cut off the weak ones. Remove branches that hang low or cross through the middle, and thin the shade trees a little as the cacao grows.
Month 18: Bag the young pods
When the first flowers set into small green pods, many farmers slip a plastic sleeve or newspaper bag over each pod, open at the bottom, to keep the pod borer out. Pick off and bury rotting, black or bored pods every week.
Harvest (Anihan)
Month 30: Cut the ripe pods
Steady harvest starts at about 30 months. Pods ripen five to six months after flowering. Cut ripe pods, yellow or orange or deep red by clone, with a sharp knife or pruning shears every two weeks, without pulling or damaging the flower cushion on the trunk.
Month 30: Ferment and dry the beans
Open the pods within a few days and heap the wet beans in a wooden box or a basket lined with banana leaves, covered, for about five to seven days, turning them every two days. Then sun dry them on raised trays or mats for about a week, until the beans are crisp and crack when pressed. Tip: Bury or compost the empty husks so pests do not breed in them.
- Open the pods with a clubSplit the pods with a wooden club or a pod splitter, not a bolo, which cuts the beans and lets in mold and insects. Scoop out the beans, pull off the core strands, and leave out black or broken beans.
- Choose a box, basket or heapA wooden box about 75 cm to 1 m square and 45 cm deep, with holes for draining, ferments about 200 to 400 kg of wet beans. Smaller lots of about 50 kg or more go in a basket lined with banana leaves, or in a heap on banana leaves or a mat with holes, set on wood above the ground.
- Cover to keep the heat inCover the beans with banana leaves or jute sacks, and keep the box or basket under a roof so no rain gets in. The heat inside the pile is what turns the beans.
- Turn them every two daysabout 5 to 6 daysAfter two days, turn the whole mass so the outside beans go to the middle. Turn again two days later. Most lots are done in about five days, baskets in five to six.
- Judge by smell and colorSmell the pile and cut a few beans open as the days go by. Farmers judge when fermenting is done by the sour smell and by the color of the beans inside and out.
- Sun dry on mats or traysSpread the fermented beans on bamboo mats, plastic sheets or screen trays, never on bare cement or soil where dust and dirt get in. Stir them often and cover them at night and in rain. Dry them down from very wet to about 7 percent moisture. Tip: Where the weather is poor, sun dry for a day or two and finish in a dryer kept below 60 degrees, since fast, hot drying leaves the beans sour.
Watering kakaw, stage by stage
Cacao here is almost always rain fed: the nursery is watered by can or hose every day, seedlings go out as the rains begin, and young trees planted late get a pail of water in their first dry months. Grown trees under coconut are left to the rain, with mulch and shade to hold the soil moisture. A watering can with a rose or a soft hose in the nursery, and a pail or hose into the mulched ring for young trees in the field. A few farms run drip lines, some fed by gravity from a drum on a stand. Water early in the morning.
Seedlings and new grafts in the nursery, which die quickly when the bags dry. The first dry season in the field, when most young trees are lost. Flowering and the first three months of pod growth, when dry soil makes small pods wither on the branch.
| Stage | When | How often | How much |
|---|---|---|---|
| Seedlings and grafts in the nursery | 5 months before planting to 7 days before planting | In hot, sunny weeks every morning and again early in the afternoon. When the plants are older and the sky is cloudy, every other day | A sprinkle from a can with a rose or a soft hose, enough to wet the top few cm of the bag soil without flooding it |
| Hardening and planting day | 7 days before planting to planting day | Water well for the few days after turning the bags. Soak the bags just before planting | Enough to wet each bag right through |
| Planting to 3 months | Planting day to month 3 | Water for the first few days after planting, then only in dry weeks | A good soak of the mulched ring around the stem |
| First dry season | Month 3 to 12 | Once or twice a week whenever no rain falls | Enough to soak the ring under the leaves a hand deep |
| Second year, before the first flowers | Month 12 to 18 | About once a week in the dry months where water is near | A deep soak of the ring under the leaves |
| Flowering and young pods (cherelles) | Month 18 to 21 | About once a week in dry spells, keeping the soil evenly moist | A deep soak under the crown, up to about 20 liters a tree a day on drip in the driest weeks |
| Pod filling to the first ripe pods | Month 21 to 24 | Water in long dry spells | A deep soak under the crown |
| Bearing trees, flowering and fruiting all year | Year 2 to 3 | Left to the rain in wet months. About once a week in the dry months | Up to about 200 liters a tree a week in the driest months, or about 20 liters a tree a day on drip |
Without irrigation. Plant as the rains begin, under the light shade of coconut, banana or kakawate, and keep a mulch of dry leaves or cut grass around each tree, off the stem. Cacao fits best where rain is spread through the year and the dry season lasts no more than about 3 months. A month with less than about 10 cm of rain sets the trees back. Where the dry months run longer, rain fed farms lose young trees and get few pods until the rains return.
In the dry season. Young trees: once or twice a week. Bearing trees: about once a week, with up to about 200 liters a week for a big tree where water allows. Water when the leaves hang limp in the afternoon, when no new leaves come, or when the small pods start to yellow and dry.
In the rainy season. Long rains bring black pod rot, which spreads in splashing rain and in puddles under the trees. Dig drains so water does not stand, prune the cacao and the shade trees so the farm dries out between showers, and pick and bury sick pods every week. Waterlogged roots die and the tree yellows and dies back.
- Too little water: Leaves hang limp and lose their shine, older leaves yellow and fall, new leaf flushes stop, few flowers open, and many small pods turn yellow, then black, and dry up on the branch.
- Too much water: Yellowing and dieback on waterlogged ground, and many black, rotting pods after long rains.
To water better for a higher yield: A simple drip line, even fed by gravity from a raised drum, through the dry months keeps nearly all young trees alive and keeps bearing trees flowering and holding their pods. Keep the shade and a thick mulch, and prune both the cacao and the shade trees so the farm dries out between rains, which cuts black pod.
Spacing, water and fertilizer for kakaw
Spacing
About 3 m x 3 m in open fields, a little over 1,100 trees a hectare, with banana or kakawate shade between. Under coconut, one or two rows of cacao go between the coconut rows, about 3 m apart along the row and kept a few meters away from the coconut trunks. One seedling a hole.
Water
Cacao here is almost always rain fed. Planting is timed to the start of the rains, and young trees planted late are hand watered in the first dry months. Mulch and shade keep the soil damp. Farms with long dry months struggle without water.
Fertilizer
Compost and chicken or animal manure in the planting hole and in a ring under the tree, mostly during the wet season. Farmers who buy fertilizer use complete fertilizer (14 14 14) or ammonium phosphate (16 20 0) at the start of the rains and again about three months later, with urea (46 0 0) for growth. Many old farms get little or no feeding. To read what a bag really gives, see our guide to fertilizer for this crop.
Care and harvest
Care while it grows
Hand weeding and slashing between rows, mulch under the trees, regular removal of suckers, and shaping the young tree to three or four main branches. Each year after the big harvest, about a month before the rains, farmers cut out dead, low and crossing branches, keep the tree short enough to reach, and trim the shade. Bagging young pods and burying sick pods and husks are the usual pest habits.
When and how to harvest
Pods are ripe when they change color, from green to yellow or from red to orange, and sound hollow when tapped. They are cut every two weeks, opened within a few days, fermented in boxes or leaf lined baskets for about five to seven days, and sun dried until crisp. Some backyard growers skip fermenting and only dry and roast the beans to grind into tablea.
Common mistakes when planting kakaw
- Planting in full sun with no shade, so young trees scorch and stall.
- Planting seedlings of unknown trees that bear few pods.
- Pulling pods off by hand and tearing the flower cushions on the trunk.
- Leaving rotting and bored pods on the tree, so black pod and pod borer spread.
- Never pruning, so trees grow tall, dark and damp.
- Drying beans without fermenting and selling them as fermented beans.
How to get a higher yield of kakaw
The traditional way gets a crop, but small changes add up. These are the first things to change, one season at a time.
- Plant grafted seedlings of proven clones from an accredited nursery, and mix two or more clones for better pollination.
- Test the soil and feed by the result, at the start of the rains and again three months later.
- Prune every year after the main harvest and keep the shade light, about a third of the sky covered.
- Harvest every two weeks, bag young pods, and keep the farm clean of sick pods and husks.
- Ferment beans properly in boxes and dry them on raised beds to sell for a better price.
- Use integrated pest management and scout weekly for pod borer, mirid bugs and black pod.
anee.io helps with each of these. The NPK Plus calculator checks that your fertilizer plan feeds the yield you want, the pest and disease finders tell you what is on the leaves before you spray, and Anee, the smart farm technician answers your questions in Tagalog or English.
Members open this guide in the How to Plant tool and send every step to the Protocol Builder in one tap, each on its own day. There you can change the seed, the spacing and the fertilizer, then turn it into a cropping calendar for your lots.
Start from the traditional way, make it better, and let anee.io date every task from your own planting day. Free to start.
Start freeQuestions about planting kakaw
Paano magtanim ng cacao?
When do farmers plant kakaw in the Philippines?
How far apart do you plant kakaw?
How long before kakaw can be harvested?
How often do you water kakaw?
What do you plant to grow kakaw?
See every step of planting it the traditional way
Register for free to read every step with its day, the spacing, water and fertilizer, the common mistakes and what to change for a higher yield. Then send it to your Protocol Builder in one tap.
Free to register. No credit card. Works on any phone.