How to Plant Rice in the Philippines: Palay the Traditional Way, Step by Step
How to plant rice in the Philippines the traditional way: here is how most Filipino farmers plant palay, step by step from getting the field ready to the harvest, with the day of each step and what to change for a higher yield.
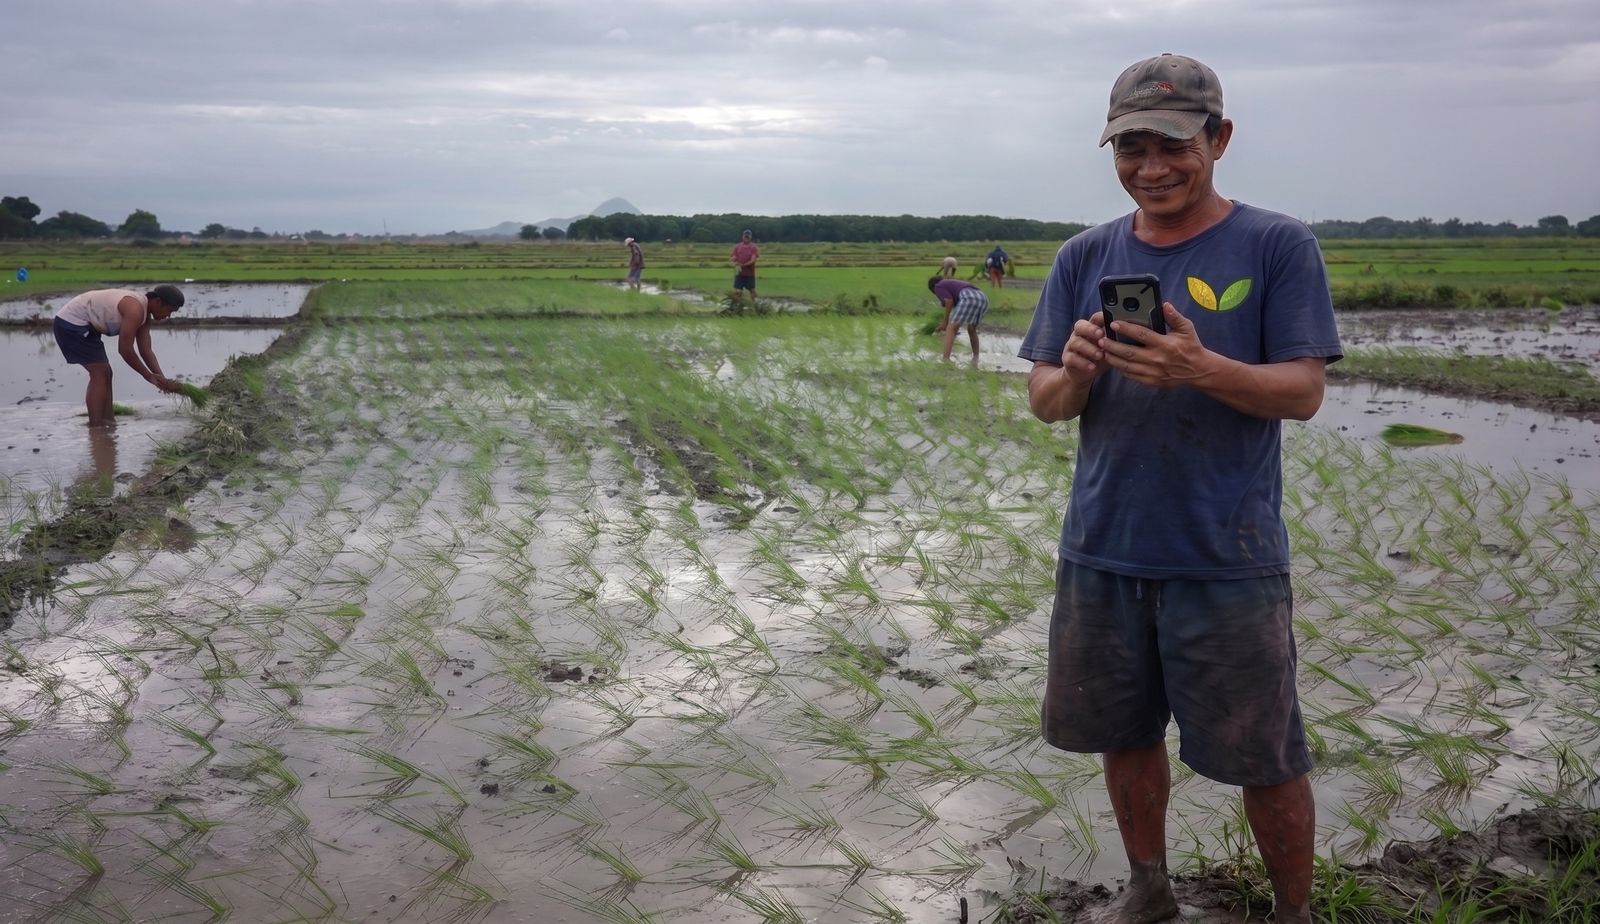
This guide shows how traditional farmers usually plant palay. Use it as a starting point. For a higher yield, update it: plant certified seed or clean planting material, test your soil, and follow the right spacing and fertilizer.
How most Filipino farmers plant palay on irrigated and rainfed lowland fields, in the three common ways: transplanting, wet direct seeding (sabog tanim) and dry direct seeding. It follows the habits passed on from farmer to farmer, then lists the changes that bring a bigger harvest.
Before you plant, get the field ready with our land preparation guide for rice. Then choose your seed or planting material with the palay nutrient deficiency guide. For more on the crop, read pagtatanim ng palay, the full season guide in Tagalog, palay from seed to grain.
When to plant palay
The wet season crop goes in with the first steady rains, mostly from late May to July, and is harvested from September to November. On irrigated land a dry season crop is planted from November to January and cut from March to May. Rainfed farms plant once a year with the rains, and dry seeded fields are sown from late April to June, just before or right as the rains settle in. In Mindanao, where rain is spread more evenly through the year, planting dates differ more from province to province.
What you plant
Seed (binhi), often kept from the last harvest or bought from a neighbor or a seed grower. For transplanting and wet seeding, the seed is soaked in clean water for about a day, the floating empty grains are skimmed off, and the wet seed is kept in a sack in the shade for another one to two days until tiny white sprouts show (pagpapatubo). For dry seeding the seed goes in dry, without soaking. On average farmers here use about 70 kg of seed a hectare when transplanting and well over 100 kg when broadcasting.
How to plant rice in the Philippines: transplanted
This is the transplanted way (Transplanted (lipat tanim)). Day 0 is transplanting day. The seedlings are already about three weeks old by then, so a variety of about 115 days from sowing is ready roughly 95 days after transplanting. The crop is ready about 95 days after transplanting.
Transplanted: before planting (Bago magtanim)
30 days before transplanting: Soak the field and fix the dikes
Let water into the paddy, or wait for the rains, until the soil softens. Patch the dikes (pilapil) and clean the canals so the field can hold water evenly.
25 days before transplanting: First plowing
Plow the soaked field with a carabao or a hand tractor and turn the stubble and weeds under. Keep water on the field so the stubble rots for about two weeks.
14 days before transplanting: Harrow the field
Harrow once or twice, about a week apart, to break the clods and bury the weeds that came up after plowing.
2 days before transplanting: Final harrowing and leveling
Harrow a last time and drag a wooden plank over the mud so the water stands at the same depth everywhere. High spots grow weeds and low spots drown young seedlings.
Transplanted: the nursery (Punlaan)
23 days before transplanting: Soak and sprout the seed
Soak the seed in clean water for about a day and skim off the grains that float. Drain it and keep it in a damp sack in the shade for one to two days until short white sprouts appear. Tip: Sprouts no longer than a grain are easier to sow and do not break.
- Float off the empty grainsPour the seed into a drum or a big basin of clean water and stir it by hand. The empty and half filled grains (tulyapis) rise to the top, so skim them off and keep only the heavy seed that sank. Wash that seed once.
- Soak it for a day24 hoursLeave the good seed under water for about a day, either in a sack dipped in a flowing canal or in a container. In a container, pour off the old water and fill it fresh every 12 hours so the seed does not sour. Tip: In cool weather the seed drinks slowly and may need up to two days of soaking.
- Rinse and drainWash the soaked seed again, then put it in sacks filled only halfway so it has room to swell and breathe. Stand the sacks to one side until the extra water stops dripping.
- Keep it warm in the sack (pagkukulob)about 24 hours, until it sproutsLay the sacks on a pallet or planks in the shade, so air moves under them, and cover them with rice straw, old sacks or plastic to hold the warmth. Keep the seed damp the whole time.
- Turn the sacks and feel the heatevery 12 hoursAfter about 12 hours, turn the sacks over so the warmth spreads and all the seed sprouts together. Push a hand into the seed: if it feels hot rather than warm, open the cover and let it cool a little before covering it again. Tip: Warm like the body, about 30 degrees, is right. Seed that gets too hot in the sack dies.
- Check the sprouts and cool the seedThe seed is ready when most grains show a short white tip at one end. Open the sacks and let the seed cool before you carry it to the seedbed.
21 days before transplanting: Sow the seedbed (punlaan)
Make raised mud beds about a meter wide in one corner of the field and scatter the sprouted seed evenly over them. Keep the beds moist at first, then let in shallow water as the seedlings grow.
- Pick the seedbed spotChoose a fertile corner that is easy to reach, close to the water source and easy to drain, where no disease showed last season. Keep it away from lamps at night, which pull in stem borers and planthoppers, and away from bushes where rats hide.
- Size it for the fieldabout a week before sowingFor one hectare, set aside about 400 square meters of seedbed and start getting it ready about a week before sowing.
- Raise and level the bedsPuddle the soil well and form beds 1 to 1.5 meters wide and about 4 to 5 cm high, as long as the paddy allows. Leave about 30 cm between beds as a small canal for draining. Make the tops flat so water spreads evenly. Tip: Working about four bags of compost or decomposed manure into the beds loosens the soil, so the seedlings pull out easily later.
- Sow the sprouted seedScatter about a handful of sprouted seed on each square meter, as evenly as you can. In the dry season sow late in the afternoon, when the sun cannot burn the sprouts. In the rainy season keep water about half a thumb deep on the beds as you sow so rain does not wash the seed together.
- Raise the water as they grow3 to 5 days, then until pullingHold the water at about half a thumb deep for the first three to five days, then raise it slowly to about a thumb deep and keep it there until the seedlings are pulled.
- Feed the seedbed once7 to 10 days after sowingAbout 7 to 10 days after sowing, scatter about 5 kg of urea (46 0 0) or 10 kg of ammonium sulfate (21 0 0) over the 400 square meters.
- Guard the bedsPut rat baits or traps around the beds and stretch strings or nets against birds. Walk the beds every few days and act early on pests or disease.
Transplanted: planting day (Pagtatanim)
Transplanting day: Pull the seedlings and transplant
Pull the seedlings at about 20 to 25 days old, wash off the mud and tie them in bundles. Push 3 to 5 seedlings into each hill, about 2 to 3 cm deep, in shallow water. Some farmers follow a marked string for straight rows, others plant by eye.
- Keep the bed wet and softKeep water on the seedbed up to pulling day. Seedlings pulled from hard, dry mud lose many of their roots.
- Pull a few at a timethe day before or the same dayPull on the day of transplanting or the day before. Take two or three seedlings between the thumb and the first finger, close to the roots, press down a little, then draw them gently toward you.
- Wash and bundleSwish the roots in the water to shake off the mud and tie the seedlings in bundles small enough to hold in one hand, with a twist of straw.
- Drop the bundles along the fieldCarry the bundles out and drop them at intervals across the paddy so each planter has seedlings within reach. Plant them the same day, because seedlings left lying around recover slowly or die.
- Plant shallow, a few to a hillHold the seedlings by the base and press the roots into the mud with the thumb and two fingers, only 2 to 3 cm deep. Deep planting slows the new tillers. Planting on a string at about 20 by 20 cm in the wet season, or 20 by 15 cm in the dry season, gives even rows.
Transplanted: care while it grows (Pag aalaga)
Day 7: Fill the missing hills
About a week after planting, walk the field and fill gaps with spare seedlings from the seedbed before the hills around them get ahead.
Day 10: First fertilizer
Broadcast complete fertilizer (14 14 14) or 16 20 0 by hand while the water is shallow. Many farmers add a little urea at this time too.
Day 20: First weeding
Pull the weeds between the hills by hand or push a rotary weeder along the rows and press the weeds into the mud. Many farmers now spray a weed killer in the first week instead.
Day 25: Watch for snails, rats and insects
Pick golden apple snails and crush their pink egg clusters in the first weeks. Check the field each week for stem borers, leaf folders, planthoppers and rat damage, and act when the damage is spreading.
Day 32: Urea when the panicle starts to form
When the young panicle begins forming inside the stem, about two months before harvest, topdress urea (46 0 0), often with potash (0 0 60). This feeding gives longer, fuller panicles.
Day 35: Clean out the off types in the seed patch
If you will keep your own seed, choose the best stand in the field, with good water and no disease, and walk it to pull out every plant that does not look like the rest. Do it again at flowering and once more before harvest.
- Mark the seed patchPick a strip with even growth, steady water and no sign of disease or pests, away from a neighbor's different variety. Mark its corners with sticks.
- Look for the plants that do not matchPull out plants that are clearly taller or shorter than the rest, with a leaf or stem of another color, or a flag leaf that points another way from the crowd.
- Check again at floweringPull the plants that flower much earlier or later than the others, and any that look sick or are badly hurt by insects.
- Check once more before harvestRemove panicles whose grains have another shape or color, or grains with awns (sungot) where the rest have none.
Day 38: Second weeding
Pull the weeds that came back before the rice closes its canopy.
Day 60: Keep water through flowering
Keep about 3 to 5 cm of water from the booting stage until the grains fill. A dry field at flowering gives many empty grains.
Day 82: Drain the field
Drain the paddy about two weeks before harvest so the soil firms up for cutting and the grains ripen evenly.
Transplanted: harvest (Anihan)
Day 95: Cut and thresh
Harvest when most grains on the panicle have turned golden, about a month after flowering. Cut with a sickle (karit) or a combine and thresh the same day or the next, without leaving cut palay piled wet in the field.
Day 96: Dry and store the grain
Spread the grain thinly on a concrete floor, nets or mats in the sun and turn it often for two to three days, until it is dry enough to keep, about 14 percent moisture. Store it in clean sacks raised off the floor.
- Spread it thinSpread the threshed palay on mats, nets, canvas or a concrete floor in a layer only about two to four centimeters deep. A thick layer dries on top and stays wet below.
- Turn it oftenevery 30 minutesRake or turn the grain about every half hour through the day so it dries evenly. On a very hot noon, pile and cover it for a while so the grain does not crack.
- Cover it fast when rain comesKeep a canvas or sacks at hand and cover the grain the moment rain starts. Grain that gets wet again after drying cracks and breaks at the mill. Keep chickens and animals off the drying floor.
- Check that it is dryMany farmers bite a grain: dry palay snaps cleanly instead of bending. A moisture meter is surer. Grain for eating or selling keeps at about 14 percent moisture or less.
- Store it off the floorFill clean sacks and stack them on pallets in a swept, dry storeroom, away from the walls. Set traps or keep a cat for rats and look the sacks over every week for weevils.
Day 96: Keep seed for the next season
Cut the seed patch apart from the rest of the crop and handle that palay with extra care: quick threshing, slow even drying, cleaning, and a dry, safe place to wait for the next planting.
- Cut the seed patch on timeHarvest the marked strip when about 85 to 90 percent of the grains on the panicles have turned the color of straw. Keep it apart from the eating palay at every step.
- Thresh it soonwithin 24 hoursThresh the seed palay within a day of cutting, on a clean mat or canvas, so it does not heat up in a wet pile.
- Dry it on a clean floorSpread it thinly on a clean mat, net or floor away from the eating palay and turn it often. Seed is dried a little further than grain, to about 12 to 14 percent moisture.
- Winnow out the light seedPour the seed slowly from about shoulder height in a steady breeze or in front of a fan. The heavy, full seed falls near you while chaff, weed seed and light grains blow away. Do it twice if needed.
- Bag, label and storeFill clean sacks or, better, sealed containers, and write the variety and the harvest date on each. Keep them in a cool, dry, shaded place raised off the floor, safe from rats, and look them over every week for insects. Tip: Seed kept dry and sealed stays good for about a year. In an open sack it soaks up the damp air and slowly loses its life.
Wet direct seeding, step by step
This is the wet direct seeding way (Wet direct seeding (sabog tanim)). Day 0 is sowing day. With no seedbed and no transplanting shock, the crop is ready about 110 days after sowing for a variety of that length. The crop is ready about 110 days after sowing.
Wet direct seeding: before planting (Bago magtanim)
21 days before sowing: Soak the field and plow
Flood or soak the field, fix the dikes, and plow with a carabao or a hand tractor to bury the stubble. Keep water on so the stubble rots.
10 days before sowing: Harrow
Harrow once or twice to break clods and kill the weeds that sprouted after plowing.
2 days before sowing: Soak and sprout the seed
Soak the seed for about a day, skim off the floaters, then keep it in a damp sack for about a day until the tips just crack open. Short sprouts do not tangle or break when thrown.
- Float off the empty grainsPour the seed into a drum or a big basin of clean water and stir it by hand. The empty and half filled grains (tulyapis) rise to the top, so skim them off and keep only the heavy seed that sank. Wash that seed once.
- Soak it12 to 24 hoursLeave the good seed under water for 12 to 24 hours, in a flowing canal or in a container. In a container, change the water every 12 hours. Tip: In cool weather it may need longer before the tips start to swell.
- Drain and rest it in the shadeabout a dayDrain the seed and keep it in half filled sacks in a shaded place where air moves around them. Turn the sacks once and open them if they feel hot.
- Stop at the first white tipFor throwing on mud, the seed is ready as soon as the tips crack open and a tiny white point shows. Sow before the roots grow longer than about half a centimeter, or they tangle in the hand and break.
1 day before sowing: Level well and cut drainage canals
Harrow a last time and level the field very carefully, since sown seed in a low spot drowns. Dig small canals around and across the field so water can be drained off after sowing.
Wet direct seeding: planting day (Pagtatanim)
Sowing day: Broadcast the sprouted seed
Drain the field until only soft wet mud is left, with no standing water. Walk in strips and scatter the sprouted seed evenly by hand, working the field twice in opposite directions so no patch is missed. Tip: Many farmers throw 100 to 150 kg a hectare to make up for seed lost to birds and snails, far more than the crop needs.
- Drain to soft mud1 to 2 daysDrain the field until only soft, wet mud is left. If the water is muddy, wait a day or two for the mud to settle before you sow, so the seed is not buried.
- Split the seed in twoWeigh the seed for the field and split it into two equal lots, one for each pass. Mark strips across the field with sticks or rice straw so you know where you have walked.
- Throw in two crossing passesWalk the first lot along the strips, throwing in wide, even swings. Walk the second lot across the first, so a patch missed in one pass is caught in the other.
- Guard the seedKeep birds away for the first days and pick snails from the canals. If some patches stay bare after about two weeks, sow them again.
Wet direct seeding: care while it grows (Pag aalaga)
Day 2: Keep the mud wet but not flooded
For about the first week keep the soil moist without standing water so the seeds can root. Drain at once after heavy rain.
Day 5: Early weed control
Weeds come up with the rice because there is no water to hold them back. Many farmers spray a weed killer in the first week while the soil is moist, then hand pull what escapes.
Day 10: Let in water slowly
When the seedlings have about three leaves, let in a thin layer of water and raise it to 3 to 5 cm as they grow. Standing water also keeps many weeds down.
Day 14: First fertilizer
Broadcast complete fertilizer (14 14 14) or 16 20 0 once the seedlings are standing well.
Day 18: Thin crowded spots and fill gaps
Pull clumps from crowded spots and push them into bare patches so the stand is even.
Day 25: Hand weeding
Pull the weeds by hand, especially grassy weeds that look like rice.
Day 28: Urea at tillering
Topdress urea (46 0 0) while the plants are tillering.
Day 35: Watch for snails, rats and insects
Check the field each week for golden apple snails, stem borers, leaf folders, planthoppers and rats, and act when the damage is spreading.
Day 45: Clean out the off types in the seed patch
If you will keep your own seed, choose the best stand in the field, with good water and no disease, and walk it to pull out every plant that does not look like the rest. Do it again at flowering and once more before harvest.
- Mark the seed patchPick a strip with even growth, steady water and no sign of disease or pests, away from a neighbor's different variety. Mark its corners with sticks.
- Look for the plants that do not matchPull out plants that are clearly taller or shorter than the rest, with a leaf or stem of another color, or a flag leaf that points another way from the crowd.
- Check again at floweringPull the plants that flower much earlier or later than the others, and any that look sick or are badly hurt by insects.
- Check once more before harvestRemove panicles whose grains have another shape or color, or grains with awns (sungot) where the rest have none.
Day 48: Urea when the panicle starts to form
Give the last urea, often with potash (0 0 60), as the young panicle starts forming inside the stem, about two months before harvest.
Day 95: Drain the field
Drain the paddy about two weeks before harvest.
Wet direct seeding: harvest (Anihan)
Day 110: Cut and thresh
Harvest when most grains are golden, about a month after flowering. Broadcast rice is denser and falls over more easily, so cut on time.
Day 111: Dry and store the grain
Thresh within a day, then sun dry in thin layers, turning often, until the grain is dry enough to keep, about 14 percent moisture.
- Spread it thinSpread the threshed palay on mats, nets, canvas or a concrete floor in a layer only about two to four centimeters deep. A thick layer dries on top and stays wet below.
- Turn it oftenevery 30 minutesRake or turn the grain about every half hour through the day so it dries evenly. On a very hot noon, pile and cover it for a while so the grain does not crack.
- Cover it fast when rain comesKeep a canvas or sacks at hand and cover the grain the moment rain starts. Grain that gets wet again after drying cracks and breaks at the mill. Keep chickens and animals off the drying floor.
- Check that it is dryMany farmers bite a grain: dry palay snaps cleanly instead of bending. A moisture meter is surer. Grain for eating or selling keeps at about 14 percent moisture or less.
- Store it off the floorFill clean sacks and stack them on pallets in a swept, dry storeroom, away from the walls. Set traps or keep a cat for rats and look the sacks over every week for weevils.
Day 111: Keep seed for the next season
Cut the seed patch apart from the rest of the crop and handle that palay with extra care: quick threshing, slow even drying, cleaning, and a dry, safe place to wait for the next planting.
- Cut the seed patch on timeHarvest the marked strip when about 85 to 90 percent of the grains on the panicles have turned the color of straw. Keep it apart from the eating palay at every step.
- Thresh it soonwithin 24 hoursThresh the seed palay within a day of cutting, on a clean mat or canvas, so it does not heat up in a wet pile.
- Dry it on a clean floorSpread it thinly on a clean mat, net or floor away from the eating palay and turn it often. Seed is dried a little further than grain, to about 12 to 14 percent moisture.
- Winnow out the light seedPour the seed slowly from about shoulder height in a steady breeze or in front of a fan. The heavy, full seed falls near you while chaff, weed seed and light grains blow away. Do it twice if needed.
- Bag, label and storeFill clean sacks or, better, sealed containers, and write the variety and the harvest date on each. Keep them in a cool, dry, shaded place raised off the floor, safe from rats, and look them over every week for insects. Tip: Seed kept dry and sealed stays good for about a year. In an open sack it soaks up the damp air and slowly loses its life.
Dry direct seeding, step by step
This is the dry direct seeding way (Dry direct seeding (dry seed on dry soil)). Day 0 is sowing day. The seed may lie in dry soil for some days until the rain comes, so the crop counts from sowing. The crop is ready about 115 days after sowing.
Dry direct seeding: before planting (Bago magtanim)
30 days before sowing: Plow the dry field
At the end of the dry season, once a light rain softens the topsoil, plow the field dry with a carabao or a tractor.
14 days before sowing: Harrow to a fine seedbed
Harrow two or three times to break the clods and kill the weeds that came up. A fine, even seedbed helps the seeds come up together.
Dry direct seeding: planting day (Pagtatanim)
Sowing day: Sow dry seed before the rains settle in
Scatter dry, unsoaked seed by hand and harrow lightly to cover it, or drop it in shallow furrows about 20 to 25 cm apart and cover. On upland fields farmers poke holes with a pointed stick, drop a few seeds in each and close the hole with the foot.
- Use dry, clean seedClean the seed of chaff and weed seed and keep it dry. Seed for dry soil is never soaked, because sprouted seed dies if the rain is late.
- Broadcasting on a flat fieldScatter the seed evenly by hand, or drop it in shallow furrows made by passing a furrower over the field, then drag a spike tooth harrow over it to cover the seed.
- Dibbling on slopesOn hillsides, where plowing is hard, poke shallow holes in rows with a long wooden or bamboo pole, often with a metal tip. Drop a few seeds in each hole and push the soil back with the foot.
Dry direct seeding: care while it grows (Pag aalaga)
Day 3: Guard the seed
Watch for birds, ants and rats feeding on the seed before the rains come and the seedlings get going.
Day 12: Early weeding
With no water on the field, weeds sprout with the rice. Hand pull or hoe them between the rows early, or spray a weed killer while they are small.
Day 14: First fertilizer
Spread complete fertilizer (14 14 14) or 16 20 0 when the soil is moist after rain.
Day 25: Hold the rainwater
Once the rains fill the paddies, close the dike openings and keep a shallow layer of water on the field, which slows the weeds.
Day 30: Second weeding
Pull or hoe the weeds that came back before the rice closes its canopy.
Day 32: Urea at tillering
Topdress urea (46 0 0) on wet soil while the plants are tillering.
Day 40: Watch for pests
Check each week for stem borers, leaf folders, planthoppers and rats, and act when the damage is spreading.
Day 45: Clean out the off types in the seed patch
If you will keep your own seed, choose the best stand in the field, with good water and no disease, and walk it to pull out every plant that does not look like the rest. Do it again at flowering and once more before harvest.
- Mark the seed patchPick a strip with even growth, steady water and no sign of disease or pests, away from a neighbor's different variety. Mark its corners with sticks.
- Look for the plants that do not matchPull out plants that are clearly taller or shorter than the rest, with a leaf or stem of another color, or a flag leaf that points another way from the crowd.
- Check again at floweringPull the plants that flower much earlier or later than the others, and any that look sick or are badly hurt by insects.
- Check once more before harvestRemove panicles whose grains have another shape or color, or grains with awns (sungot) where the rest have none.
Day 50: Urea when the panicle starts to form
Give the last urea, often with potash (0 0 60), as the young panicle starts forming, about two months before harvest.
Day 100: Drain the field
Drain any standing water about two weeks before harvest.
Dry direct seeding: harvest (Anihan)
Day 115: Cut and thresh
Harvest when most grains are golden, about a month after flowering. Old upland varieties are often longer and are cut panicle by panicle with a small blade.
Day 116: Dry and store the grain
Thresh and sun dry in thin layers until the grain is dry enough to keep, about 14 percent moisture.
- Spread it thinSpread the threshed palay on mats, nets, canvas or a concrete floor in a layer only about two to four centimeters deep. A thick layer dries on top and stays wet below.
- Turn it oftenevery 30 minutesRake or turn the grain about every half hour through the day so it dries evenly. On a very hot noon, pile and cover it for a while so the grain does not crack.
- Cover it fast when rain comesKeep a canvas or sacks at hand and cover the grain the moment rain starts. Grain that gets wet again after drying cracks and breaks at the mill. Keep chickens and animals off the drying floor.
- Check that it is dryMany farmers bite a grain: dry palay snaps cleanly instead of bending. A moisture meter is surer. Grain for eating or selling keeps at about 14 percent moisture or less.
- Store it off the floorFill clean sacks and stack them on pallets in a swept, dry storeroom, away from the walls. Set traps or keep a cat for rats and look the sacks over every week for weevils.
Day 116: Keep seed for the next season
Cut the seed patch apart from the rest of the crop and handle that palay with extra care: quick threshing, slow even drying, cleaning, and a dry, safe place to wait for the next planting.
- Cut the seed patch on timeHarvest the marked strip when about 85 to 90 percent of the grains on the panicles have turned the color of straw. Keep it apart from the eating palay at every step.
- Thresh it soonwithin 24 hoursThresh the seed palay within a day of cutting, on a clean mat or canvas, so it does not heat up in a wet pile.
- Dry it on a clean floorSpread it thinly on a clean mat, net or floor away from the eating palay and turn it often. Seed is dried a little further than grain, to about 12 to 14 percent moisture.
- Winnow out the light seedPour the seed slowly from about shoulder height in a steady breeze or in front of a fan. The heavy, full seed falls near you while chaff, weed seed and light grains blow away. Do it twice if needed.
- Bag, label and storeFill clean sacks or, better, sealed containers, and write the variety and the harvest date on each. Keep them in a cool, dry, shaded place raised off the floor, safe from rats, and look them over every week for insects. Tip: Seed kept dry and sealed stays good for about a year. In an open sack it soaks up the damp air and slowly loses its life.
Watering palay, stage by stage
Transplanted: how to water
Most farmers let water from the canal or the rains into the paddy through a cut in the dike and keep the field flooded from planting until about two weeks before harvest. Many keep it deeper and longer than the rice needs, topping it up whenever the water goes down. Water flows from the canal or a pump into the paddy through a cut in the dike, often from one paddy to the next, and the opening is closed with mud when the depth is right. Walk the field in the morning to check the depth at the high and the low spots.
First week after transplanting: keep the mud wet, since the roots are still taking hold. Booting and flowering, about day 55 to 70: never let the field dry, or many grains stay empty. Grain filling, about day 70 to 82: keep water on until the grains are firm, or they fill light.
| Stage | When | How often | How much |
|---|---|---|---|
| Soaking, plowing and harrowing | 30 to 2 days before transplanting | Keep water on the field the whole time the soil is worked | Enough to soften the soil and cover the stubble, then about 2 to 5 cm at the last leveling |
| Seedbed | 21 days before transplanting to transplanting day | Keep the beds wet from sowing day until pulling day | About half a thumb deep for the first 3 to 5 days, then about a thumb deep, 2 to 3 cm |
| First week after transplanting | Transplanting day to day 7 | Keep the soil soaked, with only a thin layer of water | Less than 3 cm, just enough to keep the mud wet |
| Early tillering | Day 7 to 30 | Keep water standing and top it up as it goes down | About 3 to 5 cm |
| Late tillering and panicle forming | Day 30 to 55 | Let the water go down and wait about 3 to 5 days after the surface dries before flooding again, or flood each time the water in a field tube drops about 15 cm below the soil | About 2 to 3 cm, or about 5 cm when you flood again |
| Booting, flowering and grain filling | Day 55 to 82 | Keep the field flooded every day, with no dry spell at all | About 5 cm of standing water |
| Ripening | Day 82 to 95 | Stop letting water in and open the dike outlets | No standing water. Drain about one week before harvest on sandy soil and about two weeks on heavy clay |
Without irrigation. Plant with the steady rains and only transplant once the paddy holds water. Fix the dikes before the season, close every outlet so each rain is kept, and choose an early variety so the crop flowers before the rains stop. A small pond dug in a corner of the farm keeps rainwater for watering at flowering if a dry spell comes.
In the dry season. On irrigated land, take water whenever your turn on the canal comes and flood the field again before the cracks get wide. Water when the soil surface shows hairline cracks or the water in a field tube has dropped about 15 cm, and never wait during booting and flowering. Deep cracks that stay open for more than three days mean the crop is already suffering.
In the rainy season. Keep low openings in the dikes so a big rain spills out instead of piling up, and let excess water out after a typhoon. Seedlings kept under water for several days can rot or die, and water deeper than 5 cm for a week or more gives fewer tillers. If bacterial leaf blight shows, drain the field at once to slow its spread.
- Too little water: Leaves roll up tight like needles in the heat of the day, leaf tips dry and turn brown, the plants stay short, and the soil cracks deep. At flowering, a dry field shows panicles that stay half inside the leaf and many empty grains.
- Too much water: Few tillers, usually under ten a hill, narrow leaves and tall, weak stems that fall over easily. Pulled roots are dark instead of reddish brown or white.
To water better for a higher yield: Alternate wetting and drying: bury a 25 cm piece of bamboo or plastic pipe with holes along its sides, leaving about 5 cm above the soil, and take out the soil inside. Flood to about 5 cm and flood again only when the water in the tube has dropped out of sight, about 15 cm below the soil. Start 21 to 30 days after transplanting, flood 3 to 5 cm a day before each fertilizer, and keep 5 cm at flowering. Level the field well under water before planting, so a thin layer covers every spot and no low corner drowns the seedlings.
Wet direct seeding: how to water
After broadcasting sprouted seed on drained mud, farmers keep the field wet but without standing water for about the first week and a half, then let water in from the canal or the rains as the seedlings stand up. From then on the field is kept flooded much like transplanted rice, until about two weeks before harvest. Water comes from the canal or a pump through a cut in the dike, and small canals inside the field carry it in and out. Drain and flood through these canals, and walk the field in the morning to check that no low spot holds water in the first week.
The first 10 days: the mud must stay moist without standing water, or the seed rots under water or dries out on cracked soil. Booting and flowering, about day 68 to 85: never let the field dry, or many grains stay empty. Grain filling, about day 85 to 95: keep water on until the grains are firm.
| Stage | When | How often | How much |
|---|---|---|---|
| Soaking, plowing and leveling | 21 to 1 days before sowing | Keep water on the field while the soil is worked, then dig small canals around and across it | Enough to soften the soil and rot the stubble |
| Sowing to about three leaves | Sowing day to day 10 | Keep the mud moist with no standing water. If the soil starts to crack, let a little water in and drain it the same day | No standing water, the mud just wet and soft |
| Seedlings standing | Day 10 to 35 | Let in a thin layer and raise it slowly as the plants grow, topping it up as it goes down | From a thin layer up to about 3 to 5 cm |
| Tillering and panicle forming | Day 35 to 68 | Let the water go down and wait about 3 to 5 days after the surface dries before flooding again, or flood each time the water in a field tube drops about 15 cm below the soil. Flood a day before each fertilizer | About 2 to 3 cm, or about 5 cm when you flood again |
| Booting, flowering and grain filling | Day 68 to 95 | Keep the field flooded every day, with no dry spell at all | About 5 cm of standing water |
| Ripening | Day 95 to 110 | Stop letting water in and open the dike outlets | No standing water. Drain about one week before harvest on sandy soil and about two weeks on heavy clay |
Without irrigation. Sow only when the rains have settled and the paddy is full, so the field can be drained for sowing and flooded again later. Cut drainage canals before sowing so a heavy rain does not drown the seed, close the outlets once the seedlings stand, and keep a small pond in a corner of the farm for watering at flowering.
In the dry season. With canal or pump water, keep the mud moist through the first ten days and flood again before the cracks widen. After that, flood when the soil shows hairline cracks or the water in a field tube has dropped about 15 cm, and never skip a turn during booting and flowering.
In the rainy season. Heavy rain right after sowing washes the seed into the low spots and drowns it, so open the canals at once and resow bare patches. Later on, keep spillways in the dikes, drain after a typhoon, and remember that broadcast rice is dense and falls over more easily in a field kept deep all season.
- Too little water: Leaves roll up tight in the heat of the day, tips dry brown, the stand stays short and the soil cracks deep. At flowering, a dry field gives many empty grains.
- Too much water: Seed or young seedlings rotting in patches under water, few tillers, tall weak stems and dark roots instead of reddish brown ones.
To water better for a higher yield: Level the field very well before sowing and cut drainage canals, so you can drain fast in the first days and flood evenly later. Alternate wetting and drying with a field tube from about 21 to 30 days after sowing, once the weeds are under control, keeping 5 cm of water at flowering, saves water and pumping cost without losing yield.
Dry direct seeding: how to water
Dry seeded fields are sown on dry, plowed soil just before or as the rains begin and get no water but the rain for about the first month. Once the rains fill the paddies, farmers close the dike openings and hold a shallow layer of water on the field until about two weeks before harvest. The rains do most of the watering. Dikes are kept closed to hold the rain, and where a canal, a shallow well with a pump or a farm pond is close, water is let in through a cut in the dike during dry spells.
Right after the seeds sprout: a long dry spell now kills the seedlings, so a pump or a nearby pond matters most here. Booting and flowering, about day 72 to 90: the field must not dry, or many grains stay empty. Grain filling, about day 90 to 100: keep the soil wet until the grains are firm.
| Stage | When | How often | How much |
|---|---|---|---|
| Plowing and harrowing | 30 days before sowing to sowing day | Work the soil after a light rain softens the topsoil | No standing water |
| Sowing to emergence | Sowing day to day 10 | Wait for the rain. If you have a pump and the soil stays dry, give one light watering that wets the soil and drains away | Enough to wet the top few centimeters, with no water left standing |
| Seedlings in moist soil | Day 10 to 25 | Keep the soil moist with the rains. In a long dry spell, give a quick watering and drain it | Moist soil, no standing water while the plants are small |
| Paddies filled by the rains | Day 25 to 72 | Close the dike openings and hold the rainwater, topping up from a canal or pump if there is one | About 2 to 5 cm, and wet soil before each fertilizer |
| Booting, flowering and grain filling | Day 72 to 100 | Keep the field wet every day, with no dry spell | About 5 cm of standing water where you can hold it |
| Ripening | Day 100 to 115 | Drain any standing water | No standing water |
Without irrigation. This way is made for rainfed fields. Sow when the rains are about to settle in, keep the dikes whole so the first heavy rains are held, and use an early variety so the crop flowers before the rains end. A small pond in a corner of the farm, filled by the rains, can carry the crop through a dry spell at flowering.
In the dry season. Dry seeding is a start of the rains method and is not used for a dry season crop without irrigation. If the rains pause for more than a week after the seeds sprout, water once with a pump or from a pond, and water whenever the leaves roll in the morning.
In the rainy season. A heavy downpour right after sowing can pool on the low spots and rot the seed, so level well and cut a few drains. Once the plants have four or more leaves they stand a shallow flood well, but drain off water that rises over the young plants after a typhoon.
- Too little water: Leaves rolled tight in the morning, not only at noon, yellowing and brown tips, and a stand that stops growing. At flowering, many empty grains.
- Too much water: Yellow, weak seedlings in the low spots where water pools after rain, and plants that turn pale for a while when a dry field is flooded suddenly.
To water better for a higher yield: Dig a small pond in a corner of the farm to catch rain for watering at flowering, the stage that loses the most grain to drought. Level the field and keep the dikes whole before sowing, so the first rains spread evenly and the field starts holding water early.
Spacing, water and fertilizer for palay
Spacing
Transplanted rice is set by eye or in rows about 20 x 20 cm, with 3 to 5 seedlings a hill. Wet direct seeded rice is broadcast with no rows. Dry seeded rice is broadcast, or drilled in rows about 20 to 25 cm apart, and upland rice is dibbled in holes made with a pointed stick.
Water
Transplanted and wet seeded rice is kept flooded at about 2 to 5 cm from the time the plants stand up until the grains fill, with water from the canal or the rains, and drained about two weeks before harvest. Many farmers keep the field flooded all season, which uses more water than the crop needs. Wet seeded fields stay just moist, not flooded, for the first week. Dry seeded fields stay unflooded until the rains fill the paddies, about a month after sowing.
Fertilizer
The usual habit is two or three feedings: complete fertilizer (14 14 14) or 16 20 0 in the first two weeks, urea (46 0 0) at tillering, and urea with or without potash (0 0 60) when the panicle starts to form. A common total is about two to four bags of complete fertilizer and two to three bags of urea a hectare, though it varies a lot from farm to farm. Some farmers also spread chicken manure or carbonized rice hull during land preparation. To read what a bag really gives, see our guide to fertilizer for rice.
Care and harvest
Care while it grows
Weeds are pulled by hand or with a push weeder at about three weeks and again at five to six weeks, though many farmers now spray a weed killer early instead. Missing hills are filled in the first week. Golden apple snails are picked by hand in the early weeks, and rats are trapped or hunted together by neighbors. Pest spraying is often done by the calendar rather than when the pests are really there.
When and how to harvest
Rice is ready about 30 days after flowering, when most grains on the panicle are golden and hard and the upper leaves are drying. It is cut with a sickle and threshed with a threshing machine, or harvested with a combine. The grain is then sun dried in thin layers to about 14 percent moisture. Wet palay left piled for days turns yellow and loses value.
Common mistakes when planting palay
- Sowing far too much seed, which costs more and gives crowded, weak plants that tiller less.
- Transplanting old seedlings, past about 25 days, that recover slowly and tiller little.
- Poor leveling, so weeds take the high spots and seedlings drown in the low spots.
- Weeding and feeding late, after the weeds have already taken the nutrients.
- Spraying insecticide early by the calendar, which kills the spiders and other helpers and can bring planthopper outbreaks.
- Planting seed saved from a hybrid crop, which does not grow true, or from the same mixed field year after year.
How to get a higher yield of palay
The traditional way gets a crop, but small changes add up. These are the first things to change, one season at a time.
- Use certified seed of a variety suited to your area and season, about 40 kg a hectare for transplanting and 60 to 80 kg for direct seeding.
- Transplant younger seedlings, about two to three weeks old, with 1 to 3 seedlings a hill in straight rows such as 20 x 20 cm or 30 x 15 cm.
- Base fertilizer on a soil test and time the urea with a leaf color chart instead of by habit.
- Keep the field weed free in the first 30 to 40 days, when weeds cost the most yield.
- Scout every week and spray only when pests reach a level that hurts yield, and skip spraying in the first month.
- Once plants are established, let the water drop to about 15 cm below the soil before flooding again, except around flowering, to save water without losing yield.
anee.io helps with each of these. The NPK Plus calculator checks that your fertilizer plan feeds the yield you want, the pest and disease finders tell you what is on the leaves before you spray, and Anee, the smart farm technician answers your questions in Tagalog or English.
Members open this guide in the How to Plant tool and send every step to the Protocol Builder in one tap, each on its own day. There you can change the seed, the spacing and the fertilizer, then turn it into a cropping calendar for your lots.
Start from the traditional way, make it better, and let anee.io date every task from your own planting day. Free to start.
Start freeQuestions about planting palay
How to plant rice in the Philippines the traditional way?
When do farmers plant palay in the Philippines?
How far apart do you plant palay?
How long before palay can be harvested?
How often do you water palay?
What do you plant to grow palay?
See every step of planting it the traditional way
Register for free to read every step with its day, the spacing, water and fertilizer, the common mistakes and what to change for a higher yield. Then send it to your Protocol Builder in one tap.
Free to register. No credit card. Works on any phone.