Paano Magtanim ng Pinya: How to Plant Pineapple the Traditional Way
Paano magtanim ng pinya? Here is how traditional Filipino farmers usually plant pinya (pineapple), step by step from getting the field ready to the harvest, with the day of each step and what to change for a higher yield.
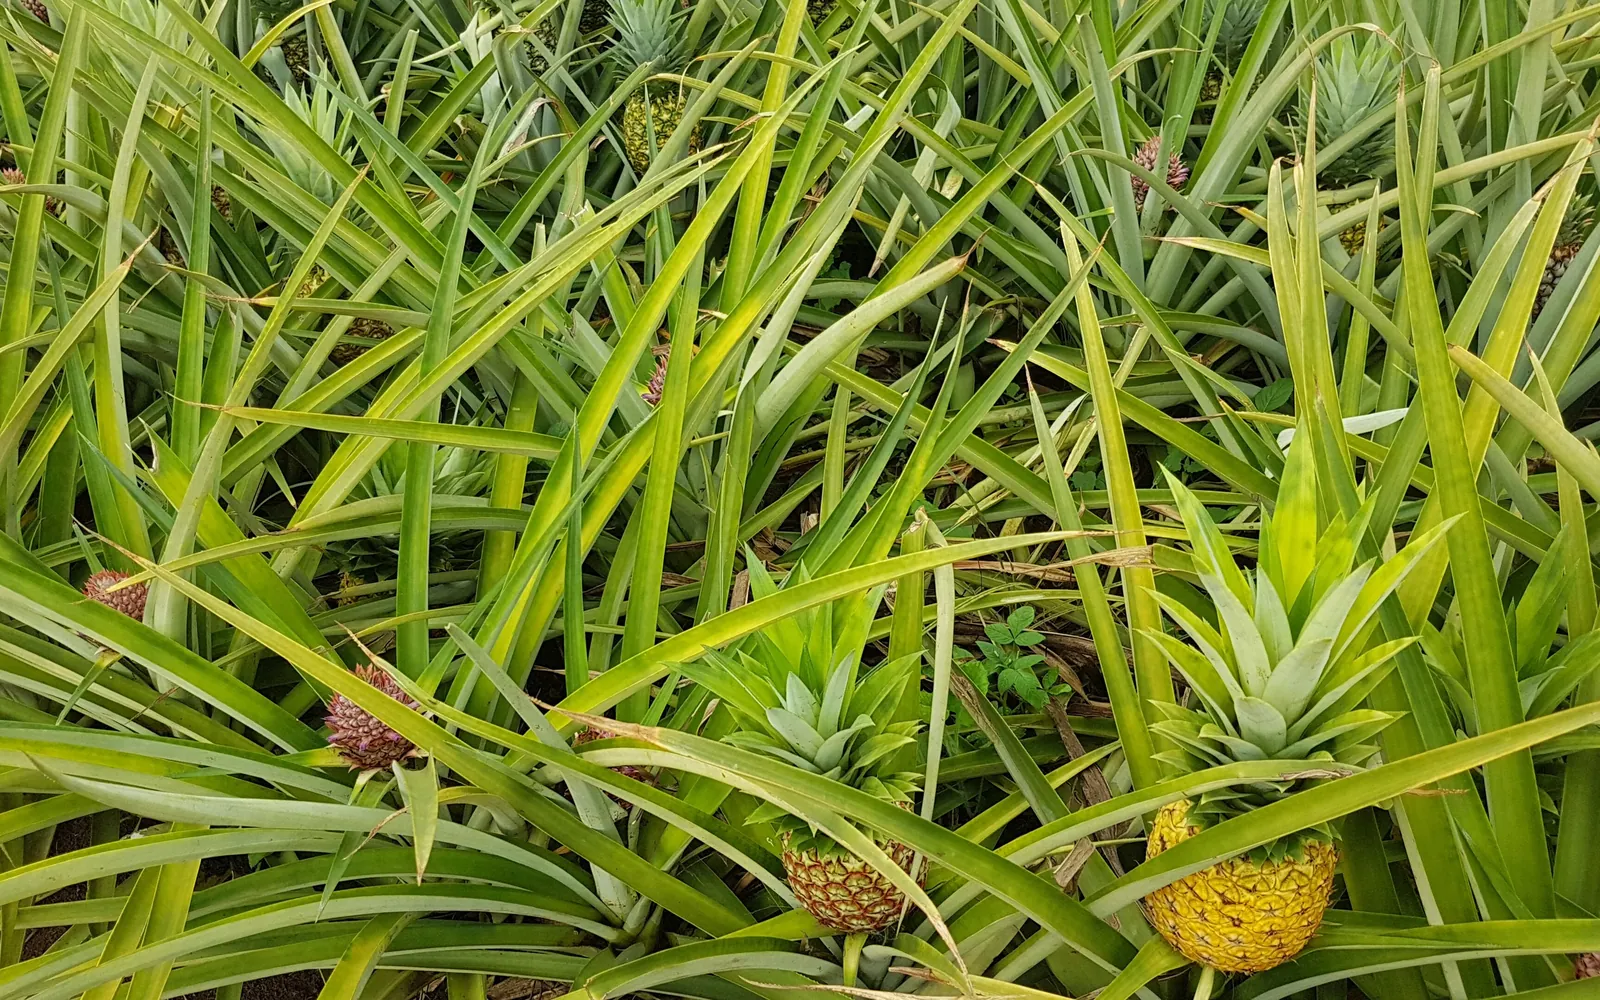
This guide shows how traditional farmers usually plant pinya. Use it as a starting point. For a higher yield, update it: plant certified seed or clean planting material, test your soil, and follow the right spacing and fertilizer.
This guide shows how small Filipino pineapple farmers in Bicol, Cavite, Batangas, Bukidnon and other provinces usually plant pineapple from suckers, care for it, force it to flower and harvest the fruit. It fits the Queen (Formosa) and native red types grown on small farms and under coconuts.
Before you plant, get the field ready with our land preparation guide for every crop. Then choose your seed or planting material with the pinya varieties sold here. If the leaves turn pale later on, the pinya nutrient deficiency guide helps you find what is missing.
When to plant pinya
Small farms mostly plant from about March to August, and the start of the rains around May to July is the favorite time because the suckers root before the dry months. Where rain comes most of the year or water is at hand, farmers plant blocks at different times so the fruit comes over many months.
What you plant
Suckers that grow from the stem of a plant that has fruited are the usual planting material. Slips from just below the fruit and crowns are also used, but crowns take the longest to bear. Farmers pick medium to large suckers, about 50 to 70 cm long, strip a few of the lowest leaves, sort them by size and leave the bases to dry for about a week before planting so they do not rot.
Paano magtanim ng pinya, step by step
From planting to the first harvest takes about 16 to 18 months for Queen planted from suckers, then about 4.5 to 5 months to a ripe fruit. Crowns can take 20 months or more before they even flower. The crop is ready about 480 days after planting.
Before planting (Bago magtanim)
30 days before planting: Clear and loosen the field
Slash the grass, take out stumps and roots, then plow and harrow until the soil is loose. Under coconuts or on slopes farmers just clear and dig the rows by hand. Tip: Make small canals so rain does not stand between the rows.
7 days before planting: Sort and dry the suckers
Pull a few of the lowest leaves off each sucker, sort them into small, medium and large, and lay them with the bases up to dry for about a week. Tip: Plant each size in its own block so the plants grow, flower and ripen together.
- Take suckers from healthy plantsTwist the suckers off plants that have already fruited and look healthy, never from plants that turned red and limp from wilt.
- Pick the right sizeMedium to large suckers, about 51 to 70 cm long and weighing about 200 to 400 g, give the biggest fruit. Very large suckers often flower early on their own and give smaller fruit.
- Strip the lowest leavesPull off a few of the dry lowest leaves so the base of the sucker is bare and clean.
- Sort them into lotsDivide the suckers into small, medium and large piles, and keep slips and crowns apart from suckers, so each lot is planted in its own block.
- Dry the bases in the sun for a weekabout 7 daysLay the suckers with their bases facing the sun for about a week, so the cut base dries and seals before it goes into the soil. Some growers also spray or dip the bases in a fungicide during this curing.
2 days before planting: Mark the rows
Stretch a line and mark single rows about 80 to 100 cm apart, or pairs of rows 50 cm apart with about 100 cm between pairs.
Planting day (Pagtatanim)
Planting day: Plant the suckers
Set each sucker about 8 to 10 cm deep and 25 to 30 cm from the next in the row. Press the soil firm around the base so it stands straight, and keep soil out of the heart.
Care while it grows (Pag aalaga)
Day 30: Replace the dead ones
Walk the rows and put a new sucker of the same size where a plant has died or rotted.
Day 45: First weeding
Hand pull and hoe the weeds in and between the rows. Leave the pulled weeds between rows as mulch to keep the soil damp.
Day 60: First fertilizer
Put a small amount of urea or ammonium sulfate near the base of each plant or into the lowest leaf bases, and add muriate of potash (0 0 60) for bigger, sweeter fruit. Repeat every two to three months until forcing.
Day 120: Second weeding
Weed again before the grass grows tall. Most farmers weed about four times before the plants close over the rows.
Day 180: Watch for wilt and rot
Look for plants turning red and limp with white mealybugs at the base, which ants carry from plant to plant, and for hearts that rot and pull out easily. Dig out and destroy sick plants.
Day 330: Force the plants to flower
When the plants are big and full of leaves, at about 10 to 12 months, pour a little carbide water or a flowering answer mixed with urea into the heart of each plant, early in the morning or at night. Tip: Force one block at a time so the harvest is spread out.
- Wait until the plants are bigForce only plants about 10 to 12 months old and full of leaves.
- Mix the carbide waterDissolve about 2 kg of calcium carbide in a kerosene can full of water, outdoors and far from any flame, since it gives off a gas that burns.
- Pour it into the heartPour about 30 ml, around three tablespoons, into the center of each plant, late in the afternoon or early in the morning when it is cool.
- Or drop a small lumpSome farmers drop a lump of carbide about the size of a sitao seed into the water held in the heart of each plant, in the morning.
- Count the days to harvest4.5 to 5 monthsMark the date for each block. Fruit is usually ready about four and a half to five months after forcing. Many growers now force with a ripening hormone mixed with urea instead of carbide.
Day 390: Shade the young fruit
When the fruit has formed, some farmers cover it with dry grass or tie the top leaves over it so the hot sun does not scorch one side.
Harvest (Anihan)
Day 480: Pick the ripe fruit
Harvest about 4.5 to 5 months after forcing, when the base of the fruit turns from green to yellow and the eyes look flat and full. Cut the stalk below the fruit with a sharp bolo and keep the crown on.
Day 481: Handle and keep planting material
Carry the fruit in boxes or baskets, not piled loose in a jeep, and keep them in the shade. Take the suckers and slips from the harvested plants for the next planting, or leave some on the plant for a smaller ratoon crop.
Watering pinya, stage by stage
Pineapple on small farms is rainfed. It stands dry spells well, so farmers water newly planted suckers only when the soil is very dry, and worry more about drainage, since standing water rots the roots and the heart. Rain only on most small farms. Where water is close, a hose or a watering can at the base of the plants, and sprinklers or drip lines on big farms. Water in the morning.
The first two months: the suckers must root, so plant when the rains come. Leaf growth, about months 2 to 11: a big, leafy plant is what makes a big fruit, and drought now stunts it.
| Stage | When | How often | How much |
|---|---|---|---|
| Planting and rooting | Planting day to day 60 | Plant with the rains. Water a new planting only if the soil is very dry and no rain comes | A good soaking at the base of each sucker, with no water left standing in the heart |
| Leaf growth | Day 60 to 330 | No regular watering. In a long dry season, water if the leaves turn reddish and curl their edges, where water is at hand | A soaking along the rows |
| Forcing to harvest | Day 330 to 480 | No regular watering. Force on a day with no rain expected, and in a long dry spell water during fruit growth if you can | A soaking along the rows when the soil is dry |
Without irrigation. This is the usual way. Plant from about May to July so the suckers root before the dry months, lay pulled weeds between the rows as mulch, and grow on slopes or ridges that drain.
In the dry season. Grown plants seldom need water. Water a new planting if the soil is dry a hand deep, and water bearing plants in a long drought when the leaves turn reddish and stay folded.
In the rainy season. Pineapple cannot stand wet feet. Plant on ridges or slopes, dig drains between the beds, and never plant in a spot where water stands after rain, since the roots and hearts rot.
- Too little water: Leaves turn reddish or yellow, roll their edges in and look thin, the plant stays small and the fruit comes out small.
- Too much water: Yellow, limp leaves, a heart that pulls out easily with a bad smell, and rotten roots.
To water better for a higher yield: Mulch between the rows with pulled weeds or plastic film to keep the soil moist and cool through the dry months. Plant early in the rains so the plants grow big before the first dry season.
Spacing, water and fertilizer for pinya
Spacing
Single rows: 25 to 30 cm between plants and 80 to 100 cm between rows, about 33,000 to 50,000 plants a hectare. Double rows: 25 to 30 cm between plants, 50 cm between the two rows of a pair and about 100 cm between pairs, about 44,000 to 53,000 plants a hectare. Suckers go in 8 to 10 cm deep.
Water
Rainfed. Pineapple stands dry spells well, so farmers only water newly planted suckers when the soil is very dry. What they watch most is drainage, since standing water rots roots and hearts.
Fertilizer
Mostly nitrogen and potash: urea or ammonium sulfate near the base or into the lower leaf bases, and muriate of potash (0 0 60) for size and sweetness, given every two to three months until forcing. Phosphorus is seldom needed in most of our pineapple soils. Some farmers add chicken manure or compost at planting, and urea goes in with the flowering answer. To read what a bag really gives, see our guide to fertilizer for this crop.
Care and harvest
Care while it grows
About four weedings by hand pulling and hoeing, with the pulled weeds left as mulch. Many small farmers plant peanut, corn or taro between the young pineapple to earn while waiting, or grow pineapple under coconuts. Sick plants are dug out, and the fruit is shaded from strong sun.
When and how to harvest
Ready about 4.5 to 5 months after forcing, when the base of the fruit turns yellow and the eyes flatten. Fruit for a far market is picked when just turning yellow at the base. Fruit for the local market can stay a little longer. Cut with a short stalk, keep the crown on, handle it gently and keep it in the shade.
Common mistakes when planting pinya
- Planting fresh suckers without drying their bases, so they rot in wet soil.
- Mixing small and big suckers in one block, so they flower and ripen at different times.
- Letting soil fall into the heart of the young plant.
- Planting where rain water stands, which brings heart and root rot.
- Forcing plants that are still small, which gives small fruit.
- Piling the fruit loose in a vehicle, which bruises it and shortens its shelf life.
How to get a higher yield of pinya
The traditional way gets a crop, but small changes add up. These are the first things to change, one season at a time.
- Use healthy suckers from a clean field and plant each size in its own block.
- Have the soil tested. Pineapple likes acid soil, and fertilizer by the result gives bigger fruit.
- Use double rows to fit more plants in each hectare.
- Keep mealybugs and the ants that carry them in check to stop pineapple wilt.
- Force blocks one after another so fruit comes all year and prices are steadier.
- Pack fruit in lined boxes and keep it cool and shaded after picking.
anee.io helps with each of these. The NPK Plus calculator checks that your fertilizer plan feeds the yield you want, the pest and disease finders tell you what is on the leaves before you spray, and Anee, the smart farm technician answers your questions in Tagalog or English.
Members open this guide in the How to Plant tool and send every step to the Protocol Builder in one tap, each on its own day. There you can change the seed, the spacing and the fertilizer, then turn it into a cropping calendar for your lots.
Start from the traditional way, make it better, and let anee.io date every task from your own planting day. Free to start.
Start freeQuestions about planting pinya
Paano magtanim ng pinya?
When do farmers plant pinya in the Philippines?
How far apart do you plant pinya?
How long before pinya can be harvested?
How often do you water pinya?
What do you plant to grow pinya?
See every step of planting it the traditional way
Register for free to read every step with its day, the spacing, water and fertilizer, the common mistakes and what to change for a higher yield. Then send it to your Protocol Builder in one tap.
Free to register. No credit card. Works on any phone.