Paano Magtanim ng Kape: How to Plant Coffee the Traditional Way
Paano magtanim ng kape? Here is how traditional Filipino farmers usually plant kape (coffee), step by step from getting the field ready to the harvest, with the day of each step and what to change for a higher yield.
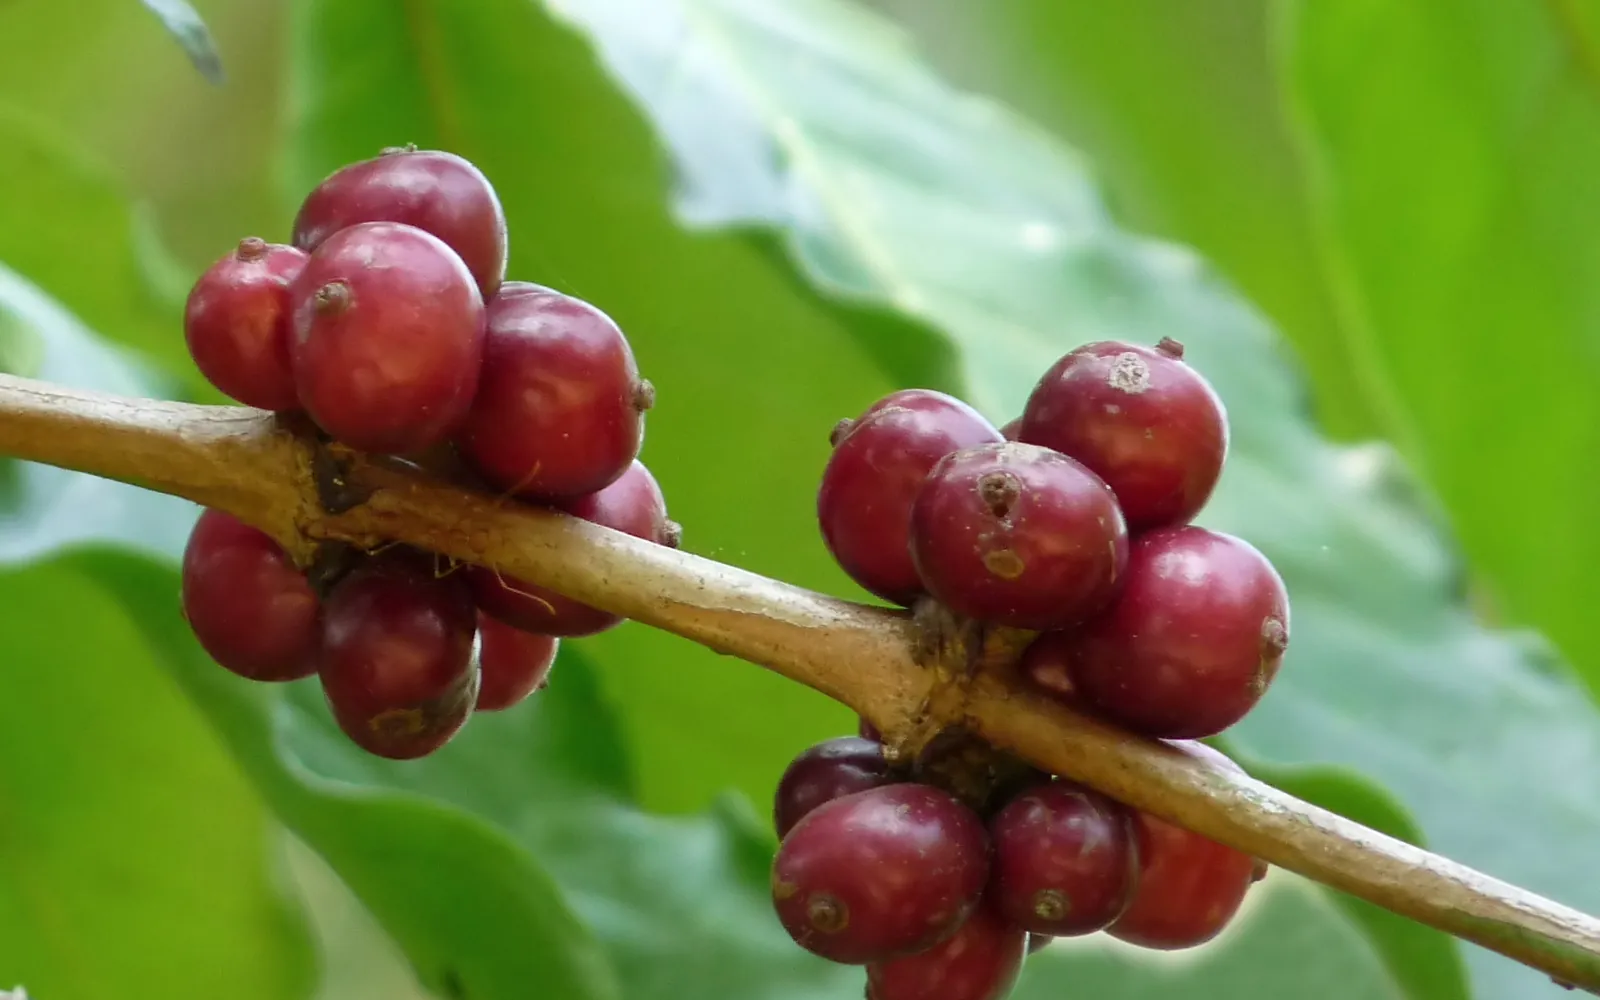
This guide shows how traditional farmers usually plant kape. Use it as a starting point. For a higher yield, update it: plant certified seed or clean planting material, test your soil, and follow the right spacing and fertilizer.
How Filipino smallholders raise coffee from a bagged seedling to the first real picking, mostly Robusta in the lowlands and middle hills, Arabica in the cool uplands, and Liberica (barako) and Excelsa in between. It is written for backyard and small farm growers who plant a few hundred trees under coconut, fruit trees or kakawate shade.
Before you plant, get the field ready with our land preparation guide for fruit and plantation trees. Then choose your seed or planting material with the kape varieties sold here. If the leaves turn pale later on, the kape nutrient deficiency guide helps you find what is missing. For more on the crop, read pagtatanim ng puno.
When to plant kape
Trees go into the field as the rains begin, usually June to August in Luzon and the Visayas, on a cloudy day. In parts of Mindanao where rain falls through most of the year, farmers plant whenever the rains are steady. Seeds are sown in the nursery about a year earlier. The main picking months are the cool months, roughly November to March.
What you plant
Most farmers plant bagged seedlings about a year old, with six to eight pairs of leaves, raised from the seeds of ripe red berries picked from their best bearing trees, or bought from a known nursery. The berries are pulped, washed and the beans sown fresh, because old coffee seed loses its life fast. Some buy grafted or rooted Robusta and Arabica for even, early bearing. A month or two before planting, the seedlings are moved into more sun to toughen them.
Paano magtanim ng kape, step by step
The first real picking comes in the third year after field planting, about 36 months (1,080 days). Arabica on a good site can start a little earlier. The crop is ready about 3 years after planting.
Before planting (Bago magtanim)
12 months before planting: Set up shade a year ahead
Where there are no coconut or fruit trees yet, plant kakawate stakes, banana or other shade trees about a year before the coffee. Coffee likes filtered light, not full open sun, especially in hot lowland farms. Tip: Do not plant the shade at the same time as the coffee. It will not be big enough to help.
2 months before planting: Clear, stake and dig the holes
Slash the weeds, keep any tree that can give shade or break the wind, and stake a straight line along the edge of the field. Dig holes about 40 to 60 cm wide and deep, fill them back with the topsoil mixed with compost, and leave them to settle until planting.
- Run a base lineStretch a straight line along one edge of the field and stake every planting spot from it at your spacing, for example 2 by 3 m for Robusta grown alone.
- Dig the holesDig each hole about 40 cm wide, long and deep, or up to about 60 cm each way, so the young roots spread easily. Keep the dark topsoil on one side.
- Fill back with topsoil and compostMix the topsoil with compost and return it to the hole, so the seedling roots into loose, fed soil.
- Let the holes settleabout 2 monthsLeave the filled holes for about two months before planting, so the soil settles and the compost starts to feed the soil.
The nursery (Punlaan)
12 months before planting: Sow fresh seeds in a seedbed
Pick fully red berries from your heaviest bearing trees, remove the pulp, wash the beans and sow them flat side down in a bed of sand or fine loam under shade. Keep the bed moist. Sprouts come up in about six to eight weeks.
- Pick seed berries from your best treesChoose fully red, sound berries from healthy trees that bear heavily and show no pest or disease. About three quarters of a kilo of seed plants a hectare, so gather about half again as much to cover seed that fails and gaps to refill later.
- Pulp and soak the beansabout 24 hoursSqueeze the skins off by hand or pass the berries through a pulper, then leave the beans under clean water for about a day so the slippery coat loosens.
- Wash and throw out the floatersRub and wash the beans clean, stir them in fresh water and skim off every bean that floats. Keep only the heavy seed that stays at the bottom.
- Dry the seed in the shadeat least 4 daysSpread the washed seed thinly on a raised tray or in a shaded, airy room and let it air dry for about four days, with its parchment skin still on. Never dry seed in hot sun. Tip: Sow it soon after: coffee seed loses its life within a few months of picking.
- Make a raised seedbedIn a shaded spot, raise a bed about 1 m wide and about 15 cm high. Fill the top with loose soil mixed about half and half with river sand, because heavy red soil alone packs too hard for the sprouts.
- Sow flat side downWater the bed, then draw shallow lines about 1 cm deep and about 10 cm apart across it. Lay the beans flat side down about 2 cm apart along each line and cover them thinly with the same mix.
- Mulch and keep it dampabout 25 days to the first sproutsCover the bed with rice straw and water it gently so the seed stays damp but never soggy. The first roots push out after about three to four weeks, and the stems lift the seed caps out of the soil some weeks later.
10 months before planting: Move sprouts into bags
When the two round seed leaves open, lift the young plants gently and set each one in a plastic bag of garden soil mixed with compost or rotted manure. Keep the bags under partial shade and water them often. Tip: Throw away seedlings with bent or curled roots. They grow poorly in the field.
- Mix fresh potting soilSieve fertile topsoil and mix about five parts of it with one part of dry manure or compost. Use new soil each time, never soil from old bags, which can carry the fungus that makes young seedlings fall over and die.
- Fill and wet the bagsFill black plastic bags of about 6 by 8 inches that have small holes for drainage. Water them well before moving the seedlings, so the soil settles.
- Lift them at the butterfly stageMove the seedlings when the two round seed leaves have just opened, or earlier while the stem still stands straight like a matchstick. Lift each one with a stick or trowel so the roots do not tear, and keep only those with a straight taproot and plenty of fine roots. Tip: A root bent like the letter J never straightens, and that tree stays weak in the field.
- Plant at the same depthOn a cool, cloudy day, poke a hole about 5 cm deep in each bag, set the seedling in and lift it a little so the root hangs straight. Firm the soil at the same depth it grew in the bed and water it.
- Line the bags up under shadeStand the bags in rows inside a bamboo or wooden frame so they do not tip over, under a roof of bamboo slats, branches or shade net that cuts about half the sun. Pull weeds and water to keep the soil damp, never soggy.
- Give the seedlings roomAs the plants grow, move the bags apart so the leaves do not crowd each other, or the seedlings grow tall and thin. Take out any bag with a sick or dead plant.
2 months before planting: Harden the seedlings
One to two months before planting, move the bags into more sunlight and water a little less, so the leaves toughen before they face the field.
- Open the shade little by little1 to 2 monthsAbout two months before field planting, start thinning the shade a little at a time, so the seedlings get used to full light over several weeks.
- Water a little lessGive the bags less water than before, enough to keep the plants from wilting, so the leaves and stems toughen.
- Check that they are readyA seedling is ready for the field when it has six to eight pairs of leaves, which takes about a year from sowing.
Planting day (Pagtatanim)
Planting day: Plant at the start of the rains
Pick a cloudy day once the rains are steady. Water the bag well, cut away the plastic, set the seedling straight up in the hole at the same depth it grew, and firm the soil around it with your feet. Tip: Avoid hot, windy days and the middle of the day.
Planting day: Give the first feed
Many farmers mix 2 to 5 kg of compost into each hole, and those who use bought fertilizer add a small handful of complete fertilizer (14 14 14), about 75 g a tree, worked into the soil away from the stem.
Care while it grows (Pag aalaga)
Day 7: Mulch around the young tree
Spread rice straw, dry grass or coffee pulp about 5 to 8 cm deep in a circle around the seedling, leaving a small gap at the stem. It keeps the soil damp and holds weeds down, which matters most as the rains end.
Day 30: Replace the dead ones
Walk the rows a month after planting and fill any gaps with spare seedlings from the nursery while the rains still last.
Month 2: Ring weed under each tree
Pull or slash the weeds in a ring under each tree and leave them as mulch. Most farmers do this three to four times a year, more often in the wet season.
Month 4: Pull off upright suckers
Rub or cut off the upright shoots that keep coming from the main trunk, so the tree puts its strength into the side branches that will bear.
Month 6: Feed again as the rains end
Farmers who fertilize usually feed twice a year, once early in the rains and once near their end, scattering compost, manure or complete fertilizer in a ring under the edge of the leaves and covering it lightly.
Month 12: Bend the stem for more trunks
Many Robusta and barako growers bend the first young stem down and tie it to a stake, so three to five new upright shoots come up along it. When they reach about 30 cm, keep the three strongest as main trunks and cut off the old bent stem. Tip: Farmers who keep one trunk instead top it at about 1.6 m in the third year.
Year 2: Clean the lower branches
Cut back branches that droop and touch the ground, and remove dead, weak or pest damaged twigs, so light and air reach inside the tree.
Month 27: Watch the flowers and young berries
The trees flower after a dry spell and the berries need about eight to ten months to ripen. Look for tiny holes at the tip of green berries, a sign of the berry borer, and pick up fallen berries so the pest has nowhere to breed.
Harvest (Anihan)
Year 3: Pick only the red berries
The first real picking comes in the third year, about 36 months after planting. Go through the trees several times in the season and pick only the fully red berries by hand, leaving the green ones to ripen. Twist each berry off without tearing the stalk so next year's flower buds stay. Tip: Keep picked berries in clean sacks or baskets, off the ground, and process them the same day.
Year 3: Dry and hull the beans
Most small farmers sun dry the whole berries on mats, nets or raised trays, turning them often and covering them at night and in rain, until the beans rattle inside the dry skin. Then they are hulled and kept in clean sacks off the floor in a dry room.
- Sort the berries the same dayPour the picked berries into water and skim off the ones that float, which are light, dry or bored by insects. Pick out green, black and overripe berries by hand. Tip: Never mix fresh berries with yesterday's berries that have started to ferment, or the whole lot spoils.
- Start drying within 12 hourswithin 12 hoursSpread the berries to dry within about half a day of picking, so they do not sour in the sack.
- Spread them thin and off the groundLay the berries on raised bamboo or net trays, or on a clean cement floor, never on bare soil, in a layer no deeper than about an inch. Beans dried on the ground pick up dirt and taste of grass.
- Rake two or three times a day2 to 3 times a dayStir or rake the berries two or three times a day so they dry evenly, and pile and cover them at night and whenever rain comes.
- Dry for two to three weeks10 days to 3 weeksSun drying takes about two to three weeks for Robusta and Arabica, and about three weeks for the big Liberica (barako) and Excelsa berries. The moisture should come down to about 12 to 14 percent.
- Shake to testShake a handful of berries: when they rattle, the beans are dry. Stop there, because overdried beans turn brittle and break at the huller, and damp ones grow mold in storage.
- Hull, sort and storeHull the dry berries, then pick out black, broken and moldy beans by hand. Keep the green beans in clean sacks on pallets in a cool, dry room.
- Or make washed coffee18 to 24 hours of fermentingFarmers who sell washed coffee remove the pulp within a day of picking, let the wet beans ferment in a tank of water for about 18 to 24 hours, wash them clean and then dry them the same way.
Watering kape, stage by stage
Nearly all coffee here is rain fed: seedlings are watered often in the nursery, planted on a cloudy day once the rains are steady, and after that left to the rain under shade and mulch. Grown trees are not watered at all, because they need the dry months to flower. A watering can with a rose for the seedbed and bags, and a pail into the mulched ring for young trees in the field. Grown trees get rain only. A few farms with a spring or tank run sprinklers to start flowering. Water in the early morning or late afternoon.
The seedbed and the bags in the nursery, which must never dry out. The first dry season after planting, when young trees die without mulch or water. The three weeks right after flowering, when a dry spell drops the young berries. Berry filling, since lack of water then gives black, shrunken beans.
| Stage | When | How often | How much |
|---|---|---|---|
| Seedbed | 12 to 10 months before planting | Every day or every other day in dry weather | A light sprinkle from a rose can, enough to keep the sand damp all the way down |
| Seedlings in bags under shade | 10 to 2 months before planting | Every day in dry weather, every 2 to 3 days in cloudy weeks | Enough to wet each bag right through |
| Hardening in more sun | 2 months before planting to planting day | A little less often, every 2 to 3 days, as the bags move into the light | Enough to keep the bags from wilting. Soak them well the day before planting |
| Planting to the end of the rains | Planting day to month 4 | Rain is usually enough. Water only in a dry week | One good soak of the mulched ring around the tree |
| First dry season | Month 4 to 12 | Once or twice a week for trees planted late or on dry, open slopes | Enough to soak the mulched ring a hand deep |
| Second year | Month 12 to 24 | Left to the rain. Water only young trees that wilt in a long dry spell | A soak of the ring under the leaves |
| Bearing trees: dry spell before flowering (each year) | Month 24 to 26 | Do not water | None |
| Flowering | Month 26 to 27 | Where water is at hand and the rain comes late, one heavy watering or sprinkler run breaks the dry spell. The trees bloom about 7 to 12 days later | A soaking like a good heavy shower over all the ground under the trees |
| Fruit set | Month 27 to 28 | Keep the soil moist for about three weeks after blooming, watering about once a week if no rain falls | The same soaking under the trees |
| Berry filling to ripening | Month 28 to 36 | Rain usually covers it. Water only in a long dry spell | A soak of the mulched ring under the leaves |
Without irrigation. Plant on a cloudy day once the rains are steady, under shade trees such as kakawate, banana or coconut, and keep 5 to 8 cm of straw, dry grass or coffee pulp around each tree. On slopes, dig short trenches along the contour between the rows to catch the rain. Shade and mulch keep the soil cool and damp enough for coffee to get through the dry months without watering.
In the dry season. Young trees in their first dry season: once or twice a week where the soil dries, more on open slopes. Bearing trees: no water until flowering is due, then, where water is at hand, one heavy soaking to bring on the bloom and a few more for about three weeks after. Water a young tree when its leaves droop at midday and are still limp in the evening.
In the rainy season. Coffee does not stand waterlogged soil: plant with the collar a little above the ground and drain flat, wet spots. Rain in the middle of the dry spell brings early, scattered flowering and an uneven harvest. Wet, crowded, heavily shaded trees get more leaf rust, so prune after harvest to let air through.
- Too little water: Leaves droop and curl at midday and stay limp in the evening, older leaves yellow and fall, few flowers open, young berries drop, and at harvest the beans come out black and shrunken.
- Too much water: Yellow leaves, rotting roots and branches dying back on waterlogged ground, and flowering in small scattered rounds after off season rains.
To water better for a higher yield: Where a spring or tank is near, one heavy sprinkler run at the end of the dry spell and a follow up about three weeks later give one even flowering and a bigger, easier harvest. Keep the shade trees and the thick mulch. They hold more water in the soil than any watering a small farm can manage.
Spacing, water and fertilizer for kape
Spacing
Robusta about 2 m x 3 m alone, or 3 m x 3 m when bananas or other crops share the field. Arabica about 2 m x 2 m alone, or 2 m x 3 m with vegetables between the rows. Liberica (barako) and Excelsa, the biggest trees, about 3 m x 4 m alone or 4 m x 4 m with other crops. One seedling a hole.
Water
Almost all coffee here is rain fed: planting is timed to the start of the rains so the young trees have months of water to root. Seedlings planted late are hand watered through the first dry months, and mulch keeps the soil damp. Older trees need a dry spell to flower and get no watering.
Fertilizer
Compost, chicken manure and rotted coffee pulp are the usual feeds, a few kilos a tree in the planting hole and again each year. Farmers who buy fertilizer use complete fertilizer (14 14 14) at planting, then complete fertilizer or urea (46 0 0) twice a year, early in the rains and near their end, spread in a ring under the edge of the leaves. Many smallholders give little or nothing, and their yields show it. To read what a bag really gives, see our guide to fertilizer for this crop.
Care and harvest
Care while it grows
Ring weeding three to four times a year, mulch under the trees, pulling off upright suckers from the trunk, and bending young stems to grow three or so trunks. After each harvest, farmers cut out dead and drooping branches. Old trees of 10 years and more are cut back low, about 30 cm from the ground, and a new sucker is grown into a fresh trunk.
When and how to harvest
Berries are ready when they turn fully red, about eight to ten months after flowering. Trees first bear in the third year after planting. They are picked by hand over several rounds, kept off the ground, and sun dried whole on mats or raised trays until hard and rattling, then hulled to green beans and stored dry in clean sacks.
Common mistakes when planting kape
- Planting in full open sun in hot lowland farms with no shade.
- Leaving the plastic bag on, planting too deep, or setting the seedling at an angle.
- Never pruning, so the trees grow tall, crowded and hard to pick.
- Stripping green, red and dry berries together, which spoils the taste and the price.
- Drying berries on bare soil or the roadside where they pick up dirt and mold.
- Sowing seed from unknown or weak trees.
How to get a higher yield of kape
The traditional way gets a crop, but small changes add up. These are the first things to change, one season at a time.
- Plant grafted or clonal seedlings of a good variety from an accredited nursery.
- Test the soil and feed by the result, with lime where the soil is very sour.
- Keep light shade, prune every year after harvest, and cut back old trees to renew them.
- Pick only ripe red berries and dry them on raised beds to sell for a better price.
- Scout for the berry borer and other pests, pick up fallen berries, and use integrated pest management.
- Match the type to the place: Arabica in the cool uplands, Robusta, Liberica or Excelsa lower down.
anee.io helps with each of these. The NPK Plus calculator checks that your fertilizer plan feeds the yield you want, the pest and disease finders tell you what is on the leaves before you spray, and Anee, the smart farm technician answers your questions in Tagalog or English.
Members open this guide in the How to Plant tool and send every step to the Protocol Builder in one tap, each on its own day. There you can change the seed, the spacing and the fertilizer, then turn it into a cropping calendar for your lots.
Start from the traditional way, make it better, and let anee.io date every task from your own planting day. Free to start.
Start freeQuestions about planting kape
Paano magtanim ng kape?
When do farmers plant kape in the Philippines?
How far apart do you plant kape?
How long before kape can be harvested?
How often do you water kape?
What do you plant to grow kape?
See every step of planting it the traditional way
Register for free to read every step with its day, the spacing, water and fertilizer, the common mistakes and what to change for a higher yield. Then send it to your Protocol Builder in one tap.
Free to register. No credit card. Works on any phone.