Paano Magtanim ng Ube: How to Plant Purple Yam the Traditional Way
Paano magtanim ng ube? Here is how traditional Filipino farmers usually plant ubi (purple yam), step by step from getting the field ready to the harvest, with the day of each step and what to change for a higher yield.
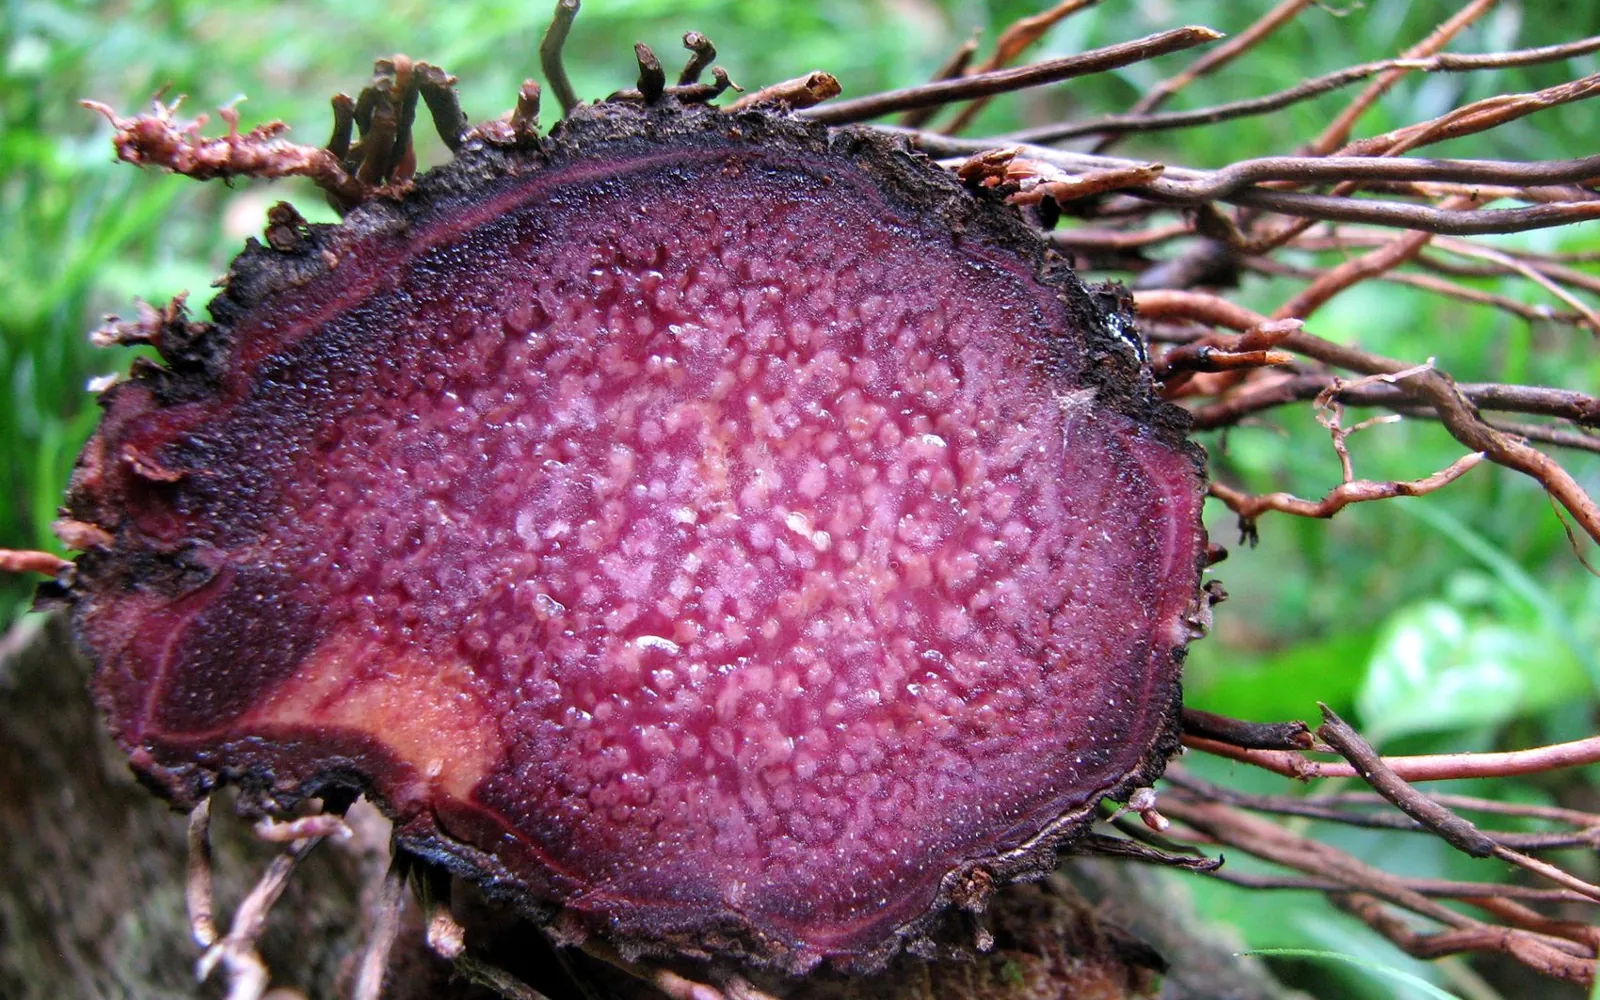
This guide shows how traditional farmers usually plant ubi. Use it as a starting point. For a higher yield, update it: plant certified seed or clean planting material, test your soil, and follow the right spacing and fertilizer.
How Filipino farmers usually grow ubi from tuber pieces on ridges or mounds, staked so the vines can climb, and dug about ten months later for the holiday market. For small farms in the lowlands and mid elevations who want the usual way and what to change for bigger tubers.
Before you plant, get the field ready with our land preparation guide for root crops. Then choose your seed or planting material with the ubi varieties sold here. If the leaves turn pale later on, the ubi nutrient deficiency guide helps you find what is missing.
When to plant ubi
Most growers put ubi in the ground between March and May, at the tail of the dry season or with the first rains, once the setts have sprouted. It grows through the rainy months, needs steady moisture while the tubers fill at about three to five months, and is dug from late November to February, when prices are best for the holidays.
What you plant
Setts cut from healthy tubers: head, middle or tail pieces of big tubers, or whole small tubers, usually 60 to 250 g each with plenty of skin. Farmers dip the cut sides in wood ash, let them dry in the air or sun, then let them sprout in the shade under a thin layer of sand or compost before planting.
Paano magtanim ng ube, step by step
The crop is ready about 300 days after planting.
Before planting (Bago magtanim)
21 days before planting: Plow deep and harrow
Plow twice and harrow twice, along and across the field, so the soil is deep and loose for the tubers. Mix in compost or manure.
3 days before planting: Make the ridges or mounds
Raise ridges about 1 m apart, following the contour on sloping land. For small patches, mounds or hills make digging easier later.
The nursery (Punlaan)
35 days before planting: Cut and dry the setts
Slice healthy tubers into pieces of about 60 to 250 g, each with a good patch of skin. Rub the cut sides with wood ash and let them dry. Tip: Do not use tubers with odd bumps or hairy roots. They may carry nematodes.
- Choose the seed tubersUse tubers from healthy, strong plants, set aside at harvest for planting. Leave out tubers with knobby bumps or a hairy look that the variety does not normally have, because that is a sign of root knot worms. Tip: Some growers soak doubtful tubers in hot water of 50 to 55 degrees for about 40 minutes, which kills the root knot worms without spoiling the tuber.
- Know the four kinds of settA big tuber gives a head piece (the top, nearest the vine), middle pieces and a tail piece. A small whole tuber is the fourth kind. Head pieces and whole tubers sprout first, so keep each kind in its own pile.
- Cut them to sizeSlice big tubers into pieces of about 60 to 250 grams, each with a good patch of skin, since the sprouts come from just under the skin. Do not cut tubers smaller than about 60 grams. Plant those whole.
- Rub ash on the cut facesDust or rub wood ash on every cut side right after slicing. The ash dries the wet flesh and keeps rot from getting in. Tip: Some growers use a fungicide on the cut faces instead of ash.
- Dry them before sproutingSpread the setts in the open air or in light sun until the cut faces are dry and firm to the touch. Then sprout them, or plant them straight in the field.
30 days before planting: Sprout the setts in the shade
Lay the setts side by side in a shaded spot, cover them lightly with river sand or compost and some mulch, and water two to three times a week until they sprout.
- Dig a shallow sprouting bedIn a shaded spot, dig a shallow trench or mark out a flat bed big enough to lay all the setts in one layer.
- Lay them side by side, by kindSet the setts close together, each kind in its own group. Lay cut pieces with the skin up or on their side, and whole tubers with the top end up or on the side.
- Cover them thinlySpread river sand, compost or fine soil thinly over them, just enough to hide them, then a little mulch to hold the moisture.
- Water and wait3 to 12 weeksWater the bed two to three times a week. Ubi rests for some weeks before it sprouts, longer or shorter by variety, so be patient.
- Take out the sprouted onesWhen a sprout is about one to two inches long, lift that sett out and keep it on a raised rack in the shade, so the sprout does not grow long and tangled. Check the bed every week or two and plant in batches. Tip: Cut back very long sprouts before carrying the setts to the field.
Planting day (Pagtatanim)
Planting day: Plant the sprouted setts
Plant one sett a hill, 50 to 60 cm apart on the ridge, about 10 to 15 cm deep, with the sprout pointing up. Trim very long sprouts first.
Day 1: Mulch the rows
Cover the rows right after planting with coconut fronds, corn stalks, rice straw or cut grass to keep the soil moist and cool and hold back weeds.
Care while it grows (Pag aalaga)
Day 21: Set the stakes and train the vines
Before the vines run, put up stakes of bamboo, wood, talahib or cassava stems set upside down. Guide the vines up the stakes, and again later when they cross the rows.
- Gather the stakesCut stakes about 1 to 2 m long from bamboo, wood, talahib or cassava stems, strong enough to hold the vines for at least seven months.
- Set cassava stems upside downIf you use cassava stems, push the young top end into the soil. Set upside down, the stem does not root and sprout into a new cassava plant.
- Choose the stake set upSet one stake a plant before the vines start to crawl. Some farmers tie the stakes to posts and wire in a straight trellis, which leaves room to weed with an animal plow. Others lean the stakes of two rows together into arches or tie several into a pyramid, which stand firmer in the wind. Tip: Arches and pyramids need fewer weedings once the leaves grow thick, but the plow cannot pass under them, and the pyramid usually yields less than the arch.
- Train the vines to the rightUbi vines twine to the right, so wind each vine around its stake in that direction when it starts to run on the ground. Train them again when long branches reach across the rows, and before each weeding or hilling up.
Day 30: First fertilizer
About a month after the shoots come up, lay half of the complete fertilizer in a shallow strip a hand width from the vine, then rake a little soil over it.
Day 45: Weed
Hand weed or use an animal drawn plow between the rows while the plants are short, lifting the vines out of the way. Repeat every one to two months.
Day 60: Second fertilizer and replanting
Put the other half of the fertilizer. Check hills with no shoots. Replace rotten setts, but leave sound ones, which may still sprout.
Day 75: Hill up
Two to three months after planting, pull soil onto the ridges to cover the growing tubers.
Day 90: Watch for leaf scorch and beetles
Look for black, burnt looking spots on leaves and vines, which spread fast in wet weather, and for beetles chewing the leaves. Remove badly sick vines.
Day 301: Store in a single layer
Clean and sort the tubers, keep good ones for the next planting, and store them in one layer on a raised rack in a dry, airy shed, with straw or banana leaves between them. Rub ash on bruised spots.
- Sort and set aside seed tubersClean off the soil and sort the tubers. Keep the healthy ones for the next planting apart from those for eating and selling.
- Ash the bruised onesSeparate the tubers with cuts or blemishes and rub wood ash on the hurt spots so mold does not start there.
- Lay them on a raised rackup to about 3 monthsBuild a rack about three feet off the ground in a dry shed where air moves. Lay the tubers flat, one layer only, and put rice straw or banana leaf between them so they do not rub, and cover them with banana leaves, coconut fronds or straw.
- Or bury them in a trenchSome farmers keep tubers in a trench in the ground, covered with soil and then coconut leaves on top.
- Keep the rats outFence the storage place well and set traps or baits, because rats and other pests go straight for stored ubi.
Harvest (Anihan)
Day 300: Dig when the vines dry up
Ubi is ready when the leaves turn yellow and the vines dry, about 10 to 11 months after planting. Dig around each hill with a bolo, shovel or fork until the tuber comes free, take it out whole and cut it off close to the vine, taking care not to wound it. Tip: Some farmers dig early at six to seven months when the price is high.
Watering ubi, stage by stage
Ubi is mostly rain fed: it goes in between March and May, at the end of the dry season or with the first rains, so the rainy months fall on the tuber filling stage at about three to five months. The rows are mulched right after planting, and where the dry season is long farmers water during tuber filling. Mostly rain. Where water is available, farmers water each hill with a hose or can or run it down the furrows between ridges. Water in the morning or late afternoon.
The first weeks after planting, while the sprouts root. Tuber filling at about three to five months: drought now gives small tubers.
| Stage | When | How often | How much |
|---|---|---|---|
| Sprouting the setts | 30 days before planting to planting day | Water the sprouting bed two to three times a week, or at least once a week, until most setts have sprouted | Moisten the sand or compost cover, never soak it |
| Planting and rooting | Planting day to day 30 | Plant sprouted setts at the start of the rains if you cannot water. Otherwise water the hills when the soil dries. Mulch right after planting | Moisten each hill, no standing water |
| Vines climbing the stakes | Day 30 to 90 | Rain is usually enough. In a dry spell water the hills about once a week | A soaking at each hill, drained |
| Tubers filling | Day 90 to 150 | Keep the soil moist. Where the dry season falls on this stage, water about two to three times a week | Moisten the whole ridge or mound, never leave water standing |
| Late growth | Day 150 to 270 | Rain only. Water in a long drought if you can | Occasional deep watering |
| Vines drying to harvest | Day 270 to 300 | No watering once the leaves yellow and the vines dry | No water |
Without irrigation. Plant at the end of the dry season or with the first rains so the rainy months fall on tuber filling at three to five months. Mulch the rows with coconut fronds, corn stalks, rice straw or cut grass right after planting, and plant sprouted setts at the start of the rains when the field cannot be watered.
In the dry season. Where the dry season lasts longer than three or four months and falls on tuber filling, water the hills about two to three times a week through that stage. Water when the leaves droop in the morning or the soil under the mulch is dry.
In the rainy season. Plant on ridges or mounds in a field that drains well. Ubi stands drought better than flooding: waterlogged hills rot the setts and tubers, and wet weather spreads leaf scorch.
- Too little water: Leaves droop and yellow early, the vines stop climbing, and the tubers come out small.
- Too much water: Setts rot in the ground, the leaves yellow and the tubers show soft, rotten patches.
To water better for a higher yield: Mulch the whole row right after planting to keep the soil moist and cool through the dry weeks. Time the planting, or the watering, so tuber filling at three to five months never goes short of water.
Spacing, water and fertilizer for ubi
Spacing
Ridges about 1 m apart and hills 50 to 60 cm apart, one sett a hill, which comes to roughly 20,000 to 28,000 setts a hectare.
Water
Mostly rainfed, planted so the rainy months fall on the tuber filling stage at three to five months. Mulch keeps the soil moist. Where the dry season is long, farmers water during tuber filling. The field must drain well.
Fertilizer
Traditional growers lean on compost or animal manure, about 2 to 5 tons a hectare mixed in at land preparation, with handfuls of manure along the hills every two months. Those who buy fertilizer often use about 6 bags of 14 14 14 a hectare in two splits, one and two months after the shoots come up. To read what a bag really gives, see our guide to fertilizer for this crop.
Care and harvest
Care while it grows
Mulching after planting, staking and training the vines before they run, weeding every one to two months, hilling up once at two to three months, and watching for leaf scorch in wet weather.
When and how to harvest
Most ubi is dug 10 to 11 months after planting, when the leaves yellow and the vines dry, mainly from late November to February. Tubers are dug with care, cut near the base, cleaned, sorted, and kept in one layer in a dry, airy place, where they last for weeks to a few months.
Common mistakes when planting ubi
- Planting setts from sick or knobby tubers that carry nematodes and rot.
- Leaving the vines to sprawl on the ground instead of staking them.
- Planting late, so the tubers fill in the dry months without water.
- Skipping mulch, which leaves the young plants in weeds and dry soil.
- Wounding the tubers at harvest or piling them up, so they rot in storage.
How to get a higher yield of ubi
The traditional way gets a crop, but small changes add up. These are the first things to change, one season at a time.
- Choose setts from healthy, true to type plants of a good variety, and sprout them before planting for an even stand.
- Stake every plant before the vines run. A trellis gives the highest yields.
- Test the soil and fertilize by the result, with manure plus balanced fertilizer in splits.
- Mulch well and water during tuber filling if the rains stop.
- Scout for leaf scorch in wet weather, remove sick vines and rotate fields.
- Handle tubers gently and store them in one layer in a dry, airy shed.
anee.io helps with each of these. The NPK Plus calculator checks that your fertilizer plan feeds the yield you want, the pest and disease finders tell you what is on the leaves before you spray, and Anee, the smart farm technician answers your questions in Tagalog or English.
Members open this guide in the How to Plant tool and send every step to the Protocol Builder in one tap, each on its own day. There you can change the seed, the spacing and the fertilizer, then turn it into a cropping calendar for your lots.
Start from the traditional way, make it better, and let anee.io date every task from your own planting day. Free to start.
Start freeQuestions about planting ubi
Paano magtanim ng ube?
When do farmers plant ubi in the Philippines?
How far apart do you plant ubi?
How long before ubi can be harvested?
How often do you water ubi?
What do you plant to grow ubi?
See every step of planting it the traditional way
Register for free to read every step with its day, the spacing, water and fertilizer, the common mistakes and what to change for a higher yield. Then send it to your Protocol Builder in one tap.
Free to register. No credit card. Works on any phone.