Paano Magtanim ng Patatas: How to Plant Potato the Traditional Way
Paano magtanim ng patatas? Here is how traditional Filipino farmers usually plant patatas (potato), step by step from getting the field ready to the harvest, with the day of each step and what to change for a higher yield.
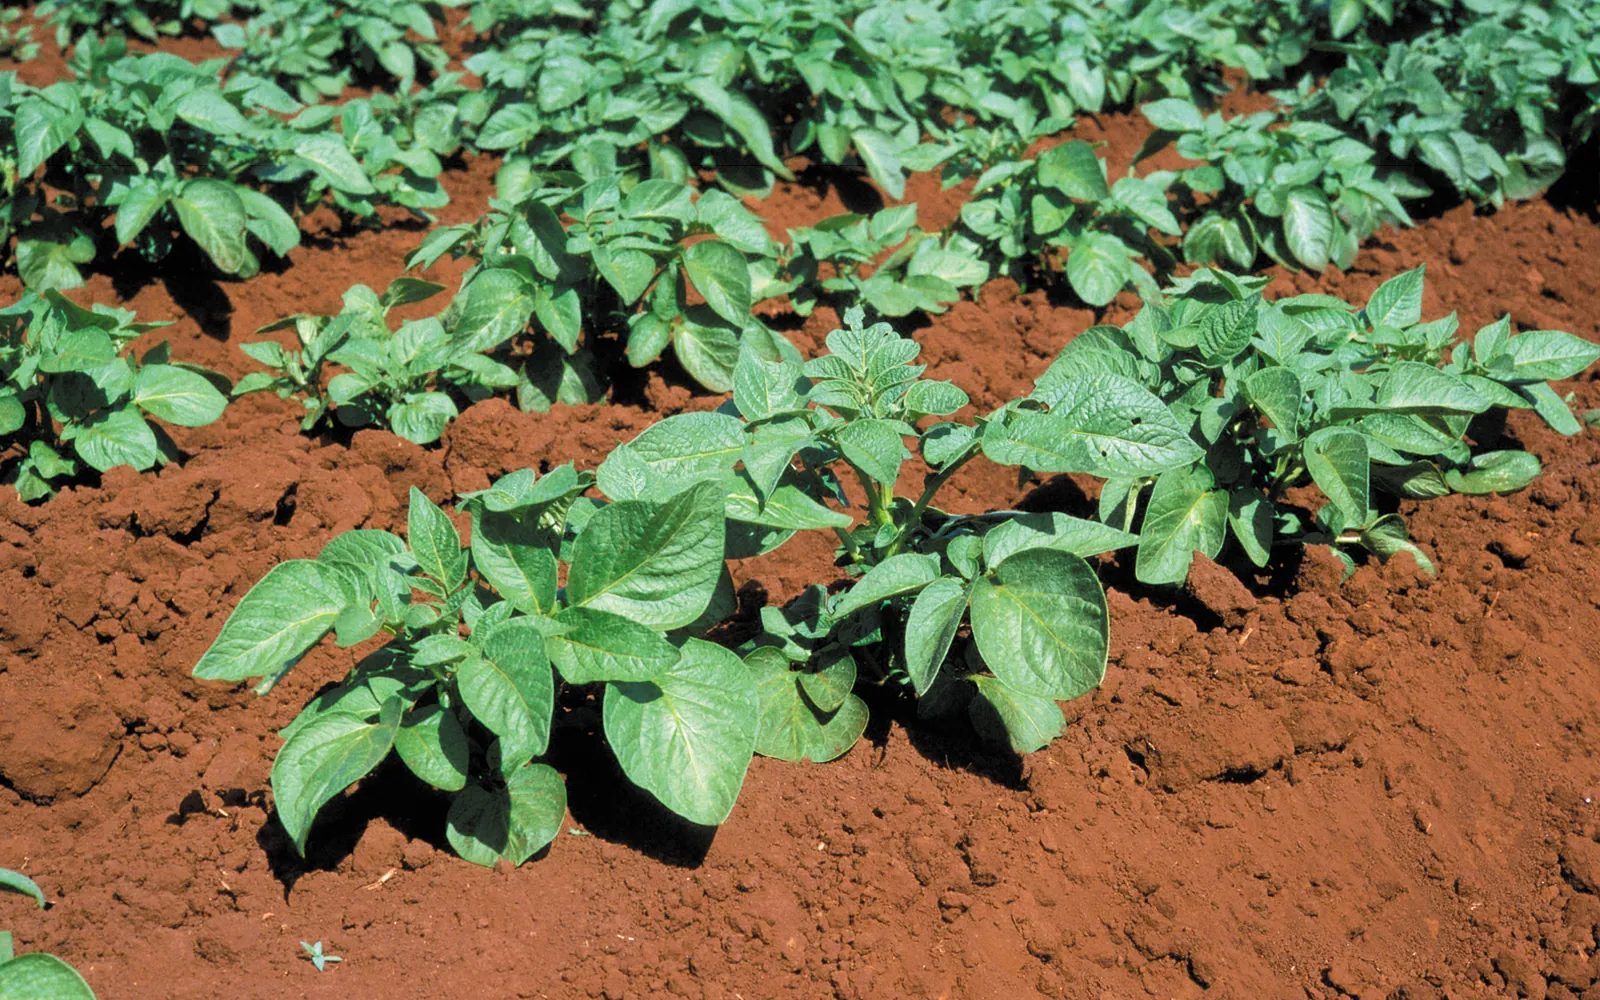
This guide shows how traditional farmers usually plant patatas. Use it as a starting point. For a higher yield, update it: plant certified seed or clean planting material, test your soil, and follow the right spacing and fertilizer.
How Filipino farmers usually grow patatas from seed tubers, on raised beds in the Benguet highlands and in plowed furrows in Bukidnon and other uplands, to the harvest about three months later. For highland growers and lowland farmers who try a cool season crop, with the changes that raise the yield.
Before you plant, get the field ready with our land preparation guide for root crops. Then choose your seed or planting material with the patatas varieties sold here. If the leaves turn pale later on, the patatas nutrient deficiency guide helps you find what is missing.
When to plant patatas
In the highlands of Benguet, Mountain Province and Bukidnon the main plantings are March to April and October to November. In the lowlands potato is planted only in the coolest months, from November to mid December, and harvested before the hot months.
What you plant
Seed tubers, ideally healthy, well sprouted pieces of about 30 to 40 g that are two to three months past harvest. A hectare takes about 1,200 to 2,000 kg. Many farmers keep their own small tubers from the last crop and let them sprout in a shaded, airy shed before planting. Bigger tubers are cut into pieces, each with eyes.
Paano magtanim ng patatas, step by step
The crop is ready about 90 days after planting.
Before planting (Bago magtanim)
30 days before planting: Lime acid soil
Where the soil is sour, spread lime about a month before planting and mix it in.
21 days before planting: Plow and harrow twice
Plow and harrow two times for a loose, crumbly soil. Spread chicken manure during land preparation.
2 days before planting: Make beds or furrows
On slopes, as in Benguet, make raised beds about 1 m wide with 50 cm paths. On flat land, open furrows about 75 cm apart with a carabao drawn plow.
The nursery (Punlaan)
14 days before planting: Ready the seed tubers
Keep the seed tubers in a shaded, airy place until they carry short, strong sprouts. If you cut big tubers, give each piece eyes and dust the cut with fine wood ash.
- Choose clean seed tubersUse small to medium tubers, about 30 to 60 grams, from a field that had no wilt, no leaf roll and no blight. Seed tubers about two to three months past their own harvest sprout best.
- Wake them from their restabout 30 to 45 daysFreshly dug potatoes rest for weeks before they can sprout. Keep the seed tubers in an airy shed where days are warm and nights cool, which breaks the rest faster, or choose a variety with a short rest. Tip: In a shed that swings between about 20 and 30 degrees, most seed tubers wake within a month or a little more.
- Sprout them in soft lightSpread the tubers in thin layers on racks or the floor of a shaded shed, where light comes in but no direct sun falls on them. In soft light the sprouts grow short, thick and green, which break less than long white sprouts grown in the dark.
- Plant at the right sprout lengthsprouts about 2 to 3 cmThe seed is ready when the sprouts are about 2 to 3 cm long. Sort the tubers so pieces of the same size, age and sprout length go into the same rows, and the stand comes up even.
- Cut big tubers with careCut large tubers into pieces so that every piece carries strong eyes or sprouts. Dust the cut faces with fine wood ash, and plant cut pieces as soon as you can in moist soil, kept out of the sun and drying wind. Tip: Some growers dust the seed with a fungicide before sprouting where rot was a problem, following the label.
Planting day (Pagtatanim)
Planting day: Fertilize the holes and plant
Drop complete fertilizer and a handful of chicken manure into each hole and bury them under a little soil so they do not touch the seed. Lay one tuber on that and bury it about 5 cm deep. Beds take two rows 30 cm apart. Holes are 30 cm apart along the row.
Care while it grows (Pag aalaga)
Day 6: First light watering
Give a light irrigation five to seven days after planting, then water every 7 to 15 days depending on rain and soil. Potato roots are shallow, so the soil must not dry out.
Day 30: Weed, hill up and side dress
About a month after planting, before the leaves close, pull the weeds, add the rest of the nitrogen and potash fertilizer, and pull soil up around the stems in one go. Tip: Where plants wilt from bacterial wilt, hill up early and gently so roots are not torn.
Day 35: Scout for blight and pests
In cool, wet weather look for dark, water soaked patches on leaves, the first sign of late blight. Check for cutworms, aphids, thrips and leaf miners, and pull out plants that wilt suddenly.
Day 50: Hill up again
Cover any tubers showing at the surface with more soil, which keeps them from turning green and from tuber moth.
Day 89: Grade and store in the dark
Sort by size, set aside damaged tubers, and keep the rest in a dark, cool, airy place. Keep healthy small tubers as seed for the next planting.
Harvest (Anihan)
Day 82: Cut the vines
When most leaves have yellowed, cut the stems 5 to 10 cm above the ground and wait five to seven days so the tuber skin hardens.
Day 88: Dig the tubers
Dig carefully with a spading fork or a pointed tool. Keep the tubers out of the sun so they do not turn green.
Day 88: Cure the tubers in a cool shed
Fresh potatoes have thin skin and fresh cuts where rot can get in. A week of rest in a cool, shaded pile lets the skin set and small wounds heal, so the tubers keep much longer.
- Pick them up quicklyGather the tubers soon after digging and never leave them lying in the sun. Cart them to the shade, or pile them and cover them right away.
- Pile them in a cool, shaded shedHeap the tubers in a cool shed or shaded place where some air moves but wind does not dry them out. Handle them gently, as every bruise is a door for rot.
- Leave them for a weekabout 7 daysLet the tubers rest in the pile for about seven days so the skin firms up and the cuts close.
- Grade them in the field and the shedSort by size, shape and soundness, and throw out diseased, cut and green tubers. Pack the good ones in wooden crates so they do not bruise on the way.
Watering patatas, stage by stage
Lowland and dry season potato is watered by furrow or hose: a light watering five to seven days after planting, then every 7 to 15 days depending on rain and soil. Highland crops in the rainy months live mostly on the rain, and the fields are drained well because soggy soil brings wilt and rot. Furrow irrigation or a hose in the lowlands. Sprinklers or hoses fed from springs in the highlands. Water in the morning so the leaves dry before the cool, damp night.
When the tubers start, around the time of the first hilling up: dry soil gives few tubers and scabby skins. Tuber filling: steady moisture, never dry, never soggy.
| Stage | When | How often | How much |
|---|---|---|---|
| Planting to sprouting | Planting day to day 6 | Plant the sprouted seed tubers into moist soil and do not water heavily until the shoots start | No water if the soil is moist. A light sprinkle if it is dry |
| First light watering | Day 6 to 7 | Give the first light irrigation five to seven days after planting | A light furrow or hose watering that moistens the ridge without soaking it |
| Leafy growth | Day 7 to 30 | Water every 7 to 15 days by furrow or hose, closer on light soil and in dry weather | Moisten the ridge to the roots, then let it drain |
| Tubers starting and filling | Day 30 to 75 | Keep to the 7 to 15 day schedule without letting the ridge dry. Water after the hilling up and side dressing | Even waterings that keep the ridge moist, no standing water in the furrows |
| Before cutting the vines | Day 75 to 88 | Stop watering about a week before cutting the vines and leave the field dry until digging | No water |
Without irrigation. Highland farmers plant the rainy season crop so it grows on the rain, on beds or ridges that drain fast. Lowland potato is grown only in the coolest dry months and cannot live on rain alone. Mulch with rice straw and water by hose or furrow.
In the dry season. Water lightly at five to seven days, then every 7 to 15 days, more often on light soil and in windy, dry spells. Water when the soil in the ridge is dry a few cm down or the leaves droop by late morning, and stop about a week before cutting the vines.
In the rainy season. Use raised beds or high ridges with open furrows so rain drains away fast. Soggy soil brings bacterial wilt, tuber rot and late blight, and potatoes left in waterlogged soil rot before harvest.
- Too little water: Leaves droop and roll, plants stay short and yellow early, and the tubers come out small, few, knobby or scabby.
- Too much water: Plants wilt suddenly while the soil is wet, leaves show dark, water soaked patches in cool weather, and tubers rot in the ground.
To water better for a higher yield: Keep the ridge evenly moist from the first hilling up to tuber filling. This one change gives more and smoother tubers. Rice straw mulch between the rows keeps the shallow roots moist and cool in the lowland dry season.
Spacing, water and fertilizer for patatas
Spacing
Benguet style beds: about 1 m wide with 50 cm paths, two rows 30 cm apart, plants 30 cm apart. Flat land: furrows 75 cm apart with plants 30 cm apart. Both come to about 44,000 plants a hectare.
Water
Lowland and dry season crops are watered by furrow or hose, first lightly at five to seven days and then every 7 to 15 days. Highland rainy season crops are mostly rainfed, but need drainage, since soggy soil brings wilt and rot.
Fertilizer
Highland farmers rely heavily on chicken manure, about 5 tons a hectare at land preparation, plus 3 to 5 bags of 14 14 14 in the planting holes. The rest of the nitrogen and potash (urea and 0 0 60) goes on at hilling up, about a month after planting. Too much nitrogen delays maturity and gives tubers that bruise easily. To read what a bag really gives, see our guide to fertilizer for this crop.
Care and harvest
Care while it grows
One main weeding, side dressing and hilling up at about a month, a second light hilling to cover exposed tubers, steady watering in dry weather, and close watch for late blight in cool, wet weather.
When and how to harvest
Most potatoes are ready 75 to 90 days after planting, when most of the leaves turn yellow. Farmers cut the vines about a week before digging so the skins harden, dig with a fork, keep the tubers out of the sun, grade them by size and store them in a dark, cool, airy place.
Common mistakes when planting patatas
- Replanting small tubers from a sick crop season after season, so virus and wilt keep cutting the yield.
- Planting seed that has not sprouted yet, or that is too old and weak.
- Planting in poorly drained soil, which invites bacterial wilt and rot.
- Forgetting to hill up, so tubers turn green or get tuber moth.
- Leaving dug tubers in the sun.
How to get a higher yield of patatas
The traditional way gets a crop, but small changes add up. These are the first things to change, one season at a time.
- Buy clean seed tubers from a trusted seed grower every few seasons instead of replanting your own for years.
- Test the soil, lime sour soils and fertilize by the result instead of guessing.
- Rotate potato with crops outside the tomato family, such as cabbage, beans or corn.
- Scout often in cool, wet weather and act at the first sign of late blight.
- Cut the vines a week before harvest and store tubers in a dark, cool shed.
anee.io helps with each of these. The NPK Plus calculator checks that your fertilizer plan feeds the yield you want, the pest and disease finders tell you what is on the leaves before you spray, and Anee, the smart farm technician answers your questions in Tagalog or English.
Members open this guide in the How to Plant tool and send every step to the Protocol Builder in one tap, each on its own day. There you can change the seed, the spacing and the fertilizer, then turn it into a cropping calendar for your lots.
Start from the traditional way, make it better, and let anee.io date every task from your own planting day. Free to start.
Start freeQuestions about planting patatas
Paano magtanim ng patatas?
When do farmers plant patatas in the Philippines?
How far apart do you plant patatas?
How long before patatas can be harvested?
How often do you water patatas?
What do you plant to grow patatas?
See every step of planting it the traditional way
Register for free to read every step with its day, the spacing, water and fertilizer, the common mistakes and what to change for a higher yield. Then send it to your Protocol Builder in one tap.
Free to register. No credit card. Works on any phone.