Paano Magtanim ng Kawayan: How to Plant Bamboo the Traditional Way
Paano magtanim ng kawayan? Here is how traditional Filipino farmers usually plant kawayan (bamboo), step by step from getting the field ready to the harvest, with the day of each step and what to change for a higher yield.
This guide shows how traditional farmers usually plant kawayan. Use it as a starting point. For a higher yield, update it: plant certified seed or clean planting material, test your soil, and follow the right spacing and fertilizer.
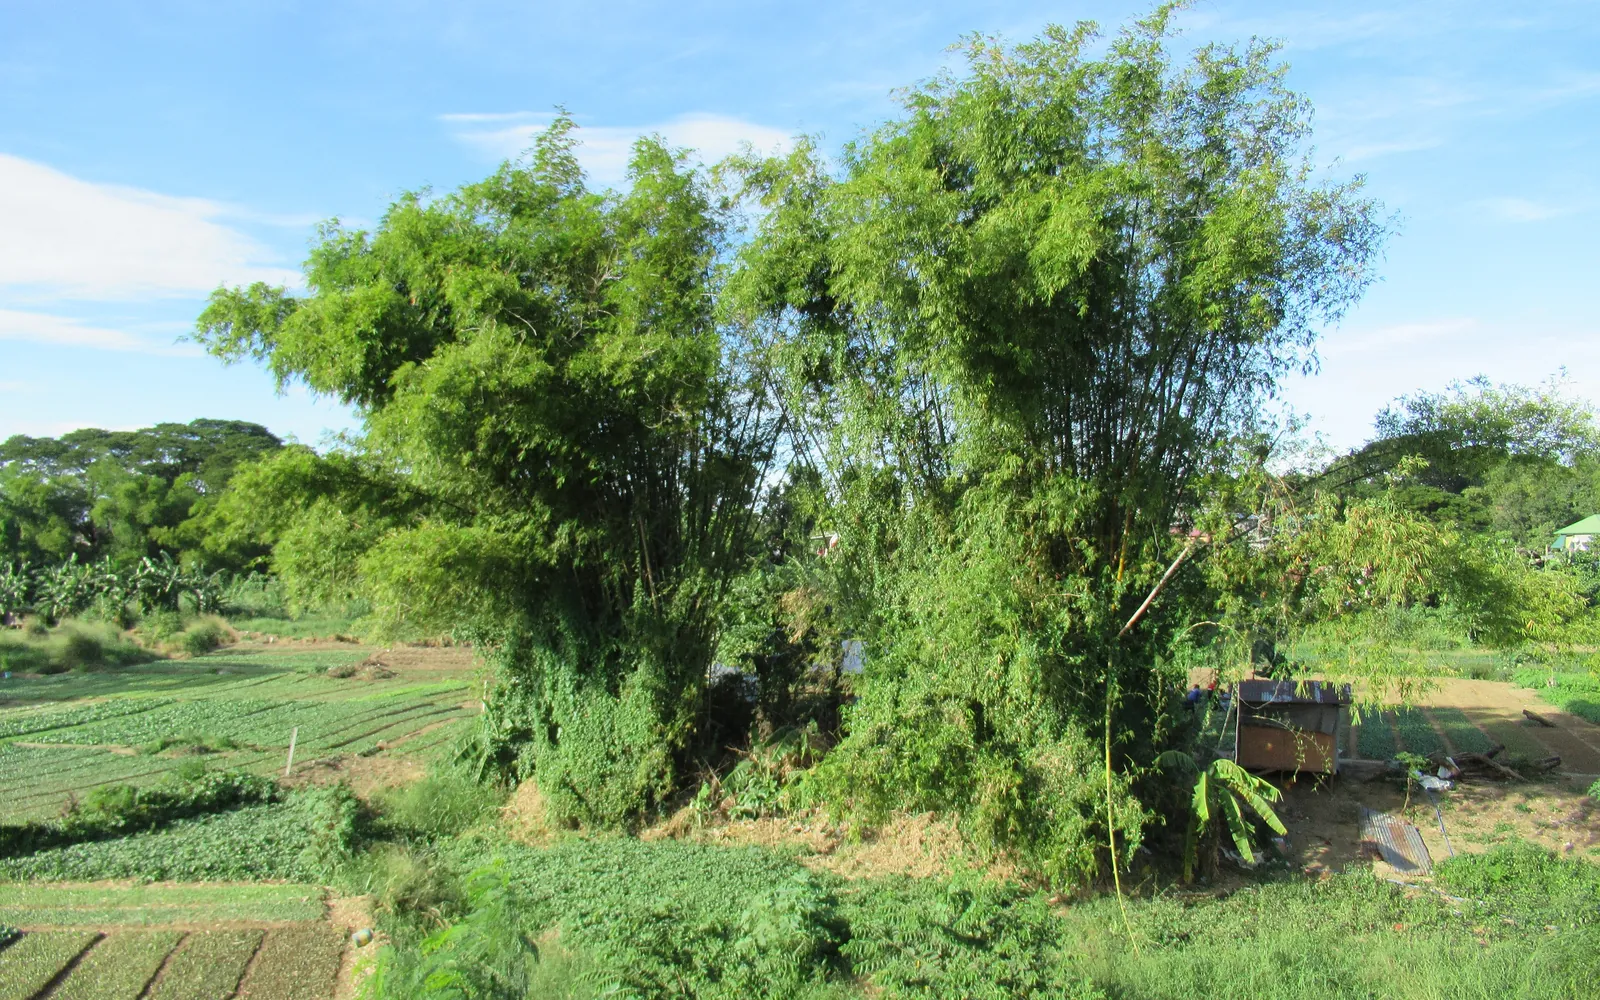
This guide shows how Filipino farmers usually start a bamboo stand from culm or branch cuttings, or from offsets dug from an old clump, and care for it until the first poles are cut at about three years. It fits kawayan tinik, bolo, bayog and giant bamboo grown for poles, crafts, shoots and riverbank protection.
Before you plant, get the field ready with our land preparation guide for fruit and plantation trees. Then choose your seed or planting material with the kawayan nutrient deficiency guide.
When to plant kawayan
Plant as the rains begin, around May to July in most of Luzon and the Visayas, so the young clumps root well before the dry months. Cuttings for the nursery are cut and set a few months earlier. Where rain falls most of the year, as in much of Mindanao, planting can go on in most months.
What you plant
For kawayan tinik and bolo, pieces of a healthy culm about 1.5 to 2 years old: branches are trimmed off leaving short stubs, and the culm is cut into pieces with one node for the nursery, or longer two to three node pieces for planting straight in the field. Giant bamboo is grown from branch cuttings with two to three nodes and live buds, taken from culms about 3 to 4 years old. Some farmers dig offsets, a young culm cut short with its rhizome and roots, from an old clump. They are heavy to carry but take well.
Paano magtanim ng kawayan, step by step
The first poles are usually cut at about 3 years. Clumps are then harvested every year for decades. Nursery days are counted back from the field planting day. The crop is ready about 3 years after planting.
Before planting (Bago magtanim)
30 days before planting: Clear and mark the planting spots
Slash the grass and mark the spots about 7 m apart each way for a pole stand, or about 5 m apart in a staggered pattern along a riverbank. Giant bamboo can be set even wider.
14 days before planting: Dig the holes
Dig a hole a little bigger than the root ball at each spot and mix the topsoil with compost or rotted manure.
The nursery (Punlaan)
6 months before planting: Cut the planting pieces
Choose a healthy culm about 1.5 to 2 years old, trim the branches leaving short stubs, and saw it into pieces with one node and a little internode on each side. For giant bamboo, take branch cuttings with two to three nodes from a culm about 3 to 4 years old. Tip: Keep the pieces wet and in the shade. A cutting that dries out will not sprout.
- Choose the mother culmFor kawayan tinik and bolo, pick a healthy culm about one and a half to two years old. For giant bamboo, use a culm about three to four years old, which gives the best branch cuttings.
- Trim off the branchesCut the side branches off the culm, leaving short stubs at each node so the buds there are not hurt.
- Saw one node piecesSaw the culm into pieces that each hold one node in the middle, with an equal length of the hollow stem left above and below it, about 4 to 6 cm on each side.
- Take branch cuttings for giant bamboo7 to 10 days to sproutFrom a giant bamboo culm, cut at least ten side branches, each with two to three nodes carrying live buds. Potted branch cuttings usually sprout in about 7 to 10 days.
6 months before planting: Set them in bags or a bed
Set the pieces in bags or a nursery bed of loose, damp soil under shade and water them often. Shoots and roots come from the nodes within a few weeks.
5 months before planting: Move rooted cuttings to the sun
About a month after setting, move the cuttings that have rooted and sprouted into full sun so they toughen. Giant bamboo branch cuttings are ready to plant out in about 3 to 4 months, kawayan tinik node cuttings in about 6 to 12 months.
Planting day (Pagtatanim)
Planting day: Plant at the start of the rains
Set the rooted cutting or offset in the hole, cover the roots and the lowest node with soil and press it firm. Culm pieces planted straight in the field go in at a slant with at least one node under the soil. Tip: Many farmers fill the hollow of a field cutting with water so it stays moist while it roots.
Care while it grows (Pag aalaga)
Day 30: Weed and mulch the young clump
Keep a clean circle around each new clump and lay cut grass or leaves around it to keep the soil damp. Keep goats and carabaos away from the young shoots.
Month 3: Replace the dead ones
Plant a new rooted cutting wherever one has died, while the rains are still on.
Month 6: Feed the clumps
Spread compost, manure or a little complete fertilizer around each clump at the start of the rains, then once a year after that.
Month 12: Mound and mulch each year
Pile soil and mulch over the base of the clump to cover the rhizomes and help new shoots come up strong.
Year 2: Clean and thin the clump
Cut out dead, broken and twisted culms and trim low thorny branches so new shoots have room and you can get into the clump later.
Harvest (Anihan)
Year 3: Cut the first mature poles
Cut only culms about three years old or more, in the dry months, close to the ground just above a node. Leave all the young culms standing to feed the clump. Tip: Mark each new culm with the year it came up so you know its age at harvest.
Year 3: Cure the poles
Many farmers soak the cut poles in running water or mud for some weeks, or leave them standing upright in the clump with their leaves on for a while, so beetles bother them less. Dry them in the shade before selling or using them.
Year 4: Harvest every year
Each dry season, cut the culms that have reached about three years and clean the clump again, always keeping enough young culms standing.
Watering kawayan, stage by stage
Cuttings in the nursery are watered often under shade, but in the field bamboo is rainfed: clumps are planted at the start of the rains and mulched. Young clumps get water only in long dry spells in their first year, and bamboo along creeks and rivers is never watered once it is set. A watering can or a hose in the nursery, in the early morning. In the field, rain, with a hand watering into the soil ring for young clumps in a dry spell.
Rooting in the nursery: the cuttings must never dry out. The first dry season after field planting: water and mulch young clumps if no rain comes.
| Stage | When | How often | How much |
|---|---|---|---|
| Cuttings rooting under shade | 6 to 5 months before planting | Water every day in the dry season and every other day in the rainy season, letting the top of the soil dry a little in between | Keep the soil moist, never soaked |
| Rooted cuttings in bags | 5 months before planting to 30 days before planting | Water every day while they grow | Enough to wet each bag through, a little water for each bag |
| Hardening | 30 days before planting to planting day | Cut back to about two or three times a week | Less water than before |
| Field planting | Planting day to day 30 | Plant at the start of the rains. Soak the bag in water before planting, and water in each plant once it is set | At least 1 liter a plant at planting, poured into a small ring of soil around it |
| The first year | Day 30 to month 12 | No regular watering in the rains. In a long dry spell, water the young clumps | A good soaking inside the soil ring, then mulch |
| Grown clumps | Month 12 to 48 | No watering. Mound soil and mulch over the base each year | None |
Without irrigation. This is the usual way. Plant at the start of the rains, from May to July in most of Luzon and the Visayas, raise a ring of soil around each plant to catch the rain, and mulch it with rice straw, cogon or cut grass.
In the dry season. Grown clumps need no water. Water young clumps in their first dry season when the leaves curl and stay rolled in the morning, and keep the mulch thick.
In the rainy season. Bamboo stands floods and wet riverbanks well once it is set, but newly planted cuttings rot in waterlogged soil, so plant them on soil that drains.
- Too little water: Leaves roll up tight and turn pale, young clumps drop their leaves, and few new shoots come up.
- Too much water: In the nursery, cuttings turn black and rot at the base. In the field, young plants in waterlogged spots turn yellow.
To water better for a higher yield: Plant along creeks and rivers or on land that holds moisture, and mulch every clump. Keep a soil ring around each young plant so every rain and every watering soaks in at the roots.
Spacing, water and fertilizer for kawayan
Spacing
About 7 m by 7 m for a kawayan tinik pole stand (about 200 clumps a hectare), about 5 m by 5 m in a staggered pattern on riverbanks, and wider, up to about 10 m by 10 m, for giant bamboo.
Water
Rainfed. Clumps are planted at the start of the rains and mulched. Young plants are watered in long dry spells during the first year. Bamboo along creeks and riverbanks rarely needs watering once it is established.
Fertilizer
Traditionally little: compost, manure, ash and fallen bamboo leaves around the clump. Growers who want more poles or shoots add complete fertilizer around each clump at the start of the rains as part of yearly clump care. To read what a bag really gives, see our guide to fertilizer for this crop.
Care and harvest
Care while it grows
Ring weeding and mulching in the first years, replacing dead cuttings, keeping animals out, yearly mounding of soil over the rhizomes, and cleaning and thinning the clump by cutting dead, broken and twisted culms. Shoots for food (labong) are taken in moderation so enough grow into poles.
When and how to harvest
The first poles are cut at about three years after planting, and each year after. Farmers cut only culms about three years old or more, in the dry months, just above a node near the ground, and leave the young culms. Poles are cured by soaking in water or mud or by leaving them standing with their leaves, then dried in the shade.
Common mistakes when planting kawayan
- Taking cuttings from culms that are too young or too old, which root poorly.
- Letting the cuttings dry out in the sun before planting.
- Cutting young, soft culms that crack and get eaten by beetles.
- Clearing a whole clump at once, which leaves it too weak to send up new shoots.
- Taking too many shoots for food, so few grow into poles.
- Never cleaning the clump, until it is a tangle that cannot be harvested.
How to get a higher yield of kawayan
The traditional way gets a crop, but small changes add up. These are the first things to change, one season at a time.
- Raise rooted cuttings in a nursery first for far better survival than bare field cuttings.
- Pick the species for the purpose: tinik for poles and fences, bolo for crafts, giant bamboo for big poles and shoots.
- Clean, thin, mound and mulch the clumps every year.
- Harvest by age, marking each culm with its year, and always leave the young ones.
- Cure or treat the poles before sale so they last longer and sell better.
- Feed the clumps at the start of the rains, guided by a soil test.
anee.io helps with each of these. The NPK Plus calculator checks that your fertilizer plan feeds the yield you want, the pest and disease finders tell you what is on the leaves before you spray, and Anee, the smart farm technician answers your questions in Tagalog or English.
Members open this guide in the How to Plant tool and send every step to the Protocol Builder in one tap, each on its own day. There you can change the seed, the spacing and the fertilizer, then turn it into a cropping calendar for your lots.
Start from the traditional way, make it better, and let anee.io date every task from your own planting day. Free to start.
Start freeQuestions about planting kawayan
Paano magtanim ng kawayan?
When do farmers plant kawayan in the Philippines?
How far apart do you plant kawayan?
How long before kawayan can be harvested?
How often do you water kawayan?
What do you plant to grow kawayan?
See every step of planting it the traditional way
Register for free to read every step with its day, the spacing, water and fertilizer, the common mistakes and what to change for a higher yield. Then send it to your Protocol Builder in one tap.
Free to register. No credit card. Works on any phone.