Paano Magtanim ng Sitaw: How to Plant String Bean the Traditional Way
Paano magtanim ng sitaw? Here is how traditional Filipino farmers usually plant sitaw (string bean), step by step from getting the field ready to the harvest, with the day of each step and what to change for a higher yield.

This guide shows how traditional farmers usually plant sitaw. Use it as a starting point. For a higher yield, update it: plant certified seed or clean planting material, test your soil, and follow the right spacing and fertilizer.
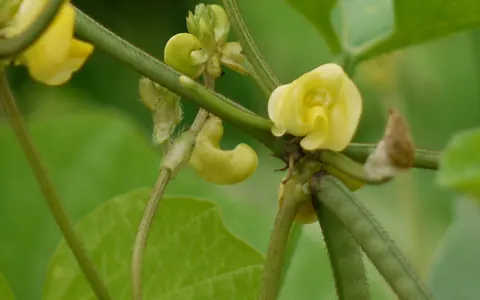
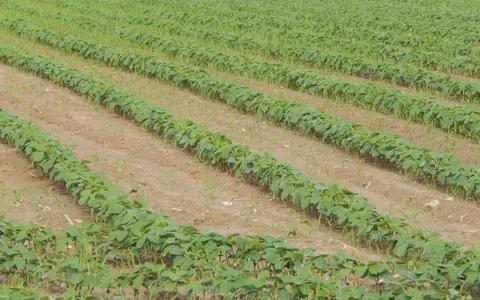
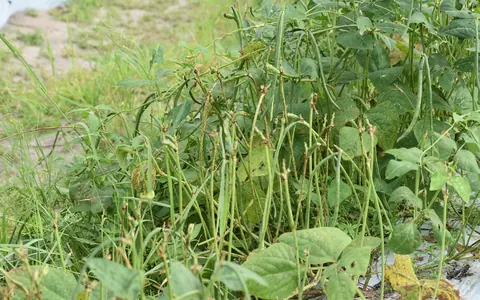
How Filipino farmers grow sitaw, the long podded bean on poles found on nearly every vegetable farm and in many backyards. It is seeded direct, trained up poles and strings, and picked every few days for weeks.
Before you plant, get the field ready with our land preparation guide for legumes. Then choose your seed or planting material with the sitaw varieties sold here. If the leaves turn pale later on, the sitaw nutrient deficiency guide helps you find what is missing.
When to plant sitaw
Planted all year where there is water. Many farmers plant at the start of the rains, around May to June, and again from October to January, when there is less disease.
What you plant
Dry seed from fully ripe, dry pods of the best plants, or bought seed. Some farmers soak the seed in water for a few hours before planting.
Paano magtanim ng sitaw, step by step
Day 55 is about the first picking. Picking then goes on every few days for a month or more. The crop is ready about 55 days after sowing.
Before planting (Bago magtanim)
14 days before sowing: Plow or dig
Plow and harrow the field, or dig the plot, and remove the weeds.
3 days before sowing: Make the rows and add manure
Make rows or raised beds about a meter apart and work dried manure or compost into them.
Planting day (Pagtatanim)
Sowing day: Plant the seed
Plant 2 to 3 seeds a hill, with hills about 30 to 50 cm apart, and cover them with 2 to 3 cm of soil. Water if the soil is dry.
Care while it grows (Pag aalaga)
Day 7: Replant the misses
Replant empty hills in the first week.
Day 10: Thin to two plants
Leave the two strongest plants in each hill.
Day 14: Set up the poles
Before the vines start to run, set up bamboo or ipil ipil poles about two meters tall, tied in an A shape with a pole across the top, and run strings or twine for the vines to climb.
- Cut the polesCut straight bamboo or ipil ipil poles, about two meters long or a little more, enough for every hill or every few hills along the row.
- Tie the A framesFor two rows close together, push a pole in beside the hills of each row, lean each pair together over the bed and tie them at the top in an A shape. Lay a long pole across the tops of the A frames and tie it fast.
- Or build a straight fence for a single rowFor one row, stand bamboo posts about three meters apart along it and stretch a wire along their tops. Tie two or three lines of nylon string or plastic straw along the top too.
- Hang the climbing stringsTie strings or plastic straw from the top line down to the base of the plants, about 25 cm apart, so each vine has its own line to climb. Tip: Put the poles up while the plants are small, about two weeks after they come up, before the runners start looking for something to cling to.
- Lead the vines upEvery few days, wind the new runners around their strings so they climb instead of tangling on the ground.
Day 15: First fertilizer
Side dress complete fertilizer (14 14 14) a hand width from the plants and cover it with soil.
Day 21: Weed and hill up
Hoe out the weeds and pull soil up to the base of the plants. Guide the vines onto the strings.
Day 30: Watch for aphids and pod borers
Check the tips and flowers for aphids and the flowers and young pods for pod borers, and pick off damaged pods.
Day 35: Feed at flowering
Give a second side dressing of complete fertilizer or urea when the plants start to flower.
Harvest (Anihan)
Day 55: Pick the young pods
Pick pods that have reached full length but are still tender, before the seeds bulge, every two to three days.
Day 85: Keep seed and clear the vines
Leave some pods on the best plants to dry for seed, then pull out the old vines.
- Mark the best plantsChoose strong, healthy plants with no pest or disease damage and true pods for the variety. Tie a string on them and stop picking their pods for the market.
- Let the pods dry on the vineLeave the seed pods hanging until they dry and turn brown, about three weeks after the flowers open. Pods from the middle part of the plant give the best seed.
- Hang the pods to dry morePick the dry pods, tie them in bunches and hang them in an airy shade to dry further before shelling.
- Shell and sun dry the seedBreak the pods open, take out the seed and spread it in the sun on a mat, turning it, until it is hard.
- Do the plastic bag testabout 30 minutesTo know if the seed is dry enough, seal about half a kilo of it in a clear plastic bag and leave it in the sun. If drops of water form inside the bag within about half an hour, the seed needs more drying.
- Store it sealed and labeledup to 2 yearsKeep the seed in a sealed jar, can or thick plastic bag with the variety and date written on it, in a cool, dry place. A little dry wood ash mixed in keeps weevils off. Seed kept this way stays good for up to two years.
- Clear the old vinesWhen the seed pods are in, pull out the old vines, take down the strings and poles for the next crop, and compost the vines.
Watering sitaw, stage by stage
In the wet season sitaw lives on the rains. In the dry season farmers water it by hand with a can or a hose, or run water into the furrows, every few days, and more often once the vines flower and bear. Hand watering with a can or a hose at the base of each hill, or furrow watering between the rows. Water in the early morning or late afternoon, and water the soil, not the leaves.
Coming up, the first week: keep the hills moist until the seedlings are out. Flowering and picking, about day 30 to 85: a dry spell drops flowers and gives short, tough pods.
| Stage | When | How often | How much |
|---|---|---|---|
| Planting and coming up | Sowing day to day 7 | Water right after planting if the soil is dry, then every day or two until the seedlings are up | Enough to keep the hills moist, never soggy |
| Young vines | Day 7 to 30 | In dry weather, every few days, when the topsoil dries | A watering can spread over a few hills, or one furrow watering |
| Flowering | Day 30 to 55 | Every few days in dry weather, more often in hot, windy weeks | Soak the root zone of each hill, or fill the furrows |
| Picking | Day 55 to 85 | Keep watering every few days through the picking weeks | The same as at flowering |
Without irrigation. Plant at the start of the rains, from May to June, on raised rows that drain. Mulch around the hills with rice straw or dry grass so the soil stays moist between rains.
In the dry season. The October to January planting needs watering every few days in the dry months. Water when the topsoil is dry to a finger joint deep or the leaves droop in the morning, and give the most during flowering and picking.
In the rainy season. Raise the rows or beds so the rain drains away, since sitaw roots rot in standing water and wet weather brings more leaf and pod diseases. Do not water on top of the rain.
- Too little water: Leaves droop in the morning and turn dull, flowers and small pods drop, and the pods come out short, curled and tough.
- Too much water: Lower leaves yellow, the vines stop growing, and roots and stem bases rot.
To water better for a higher yield: Mulch the rows with rice straw or dry grass to keep the shallow roots moist and cut the waterings. Drip lines along the rows give steady water through flowering and picking with far less water and work.
Spacing, water and fertilizer for sitaw
Spacing
Rows or beds about a meter apart, hills about 30 to 50 cm apart with two plants each, every hill reaching a pole or string.
Water
Rainfed in the wet season. In the dry season farmers water by hand or run water into the furrows every few days, more when the plants are flowering.
Fertilizer
Dried manure or compost in the rows before planting, complete fertilizer (14 14 14) at about two weeks, and another side dressing of complete fertilizer or urea at flowering. To read what a bag really gives, see our guide to fertilizer for this crop.
Care and harvest
Care while it grows
Poles and strings set up at about two weeks, weeding and hilling up, and guiding the vines. Farmers watch for aphids, bean fly and pod borers.
When and how to harvest
Picking starts at about 50 to 60 days and goes on every two to three days for a month or more. Pods are picked full length but still tender, bundled and sold fresh.
Common mistakes when planting sitaw
- Putting up the poles late, after the vines have tangled on the ground.
- Letting pods get old and seedy on the vine, which also slows new pods.
- Planting in a spot where water stands after rain.
- Spraying by habit instead of checking for pests first.
How to get a higher yield of sitaw
The traditional way gets a crop, but small changes add up. These are the first things to change, one season at a time.
- Use fresh seed of a good variety and plant into moist, well prepared soil.
- Feed by a soil test, with compost before planting and split side dressings.
- Pick every two to three days to keep the plants bearing.
- Scout twice a week for aphids and pod borers and remove damaged pods.
- Rotate with a crop that is not a bean to cut soil diseases.
anee.io helps with each of these. The NPK Plus calculator checks that your fertilizer plan feeds the yield you want, the pest and disease finders tell you what is on the leaves before you spray, and Anee, the smart farm technician answers your questions in Tagalog or English.
Members open this guide in the How to Plant tool and send every step to the Protocol Builder in one tap, each on its own day. There you can change the seed, the spacing and the fertilizer, then turn it into a cropping calendar for your lots.
Start from the traditional way, make it better, and let anee.io date every task from your own planting day. Free to start.
Start freeQuestions about planting sitaw
Paano magtanim ng sitaw?
When do farmers plant sitaw in the Philippines?
How far apart do you plant sitaw?
How long before sitaw can be harvested?
How often do you water sitaw?
What do you plant to grow sitaw?
See every step of planting it the traditional way
Register for free to read every step with its day, the spacing, water and fertilizer, the common mistakes and what to change for a higher yield. Then send it to your Protocol Builder in one tap.
Free to register. No credit card. Works on any phone.