Paano Magtanim ng Luya: How to Plant Ginger the Traditional Way
Paano magtanim ng luya? Here is how traditional Filipino farmers usually plant luya (ginger), step by step from getting the field ready to the harvest, with the day of each step and what to change for a higher yield.
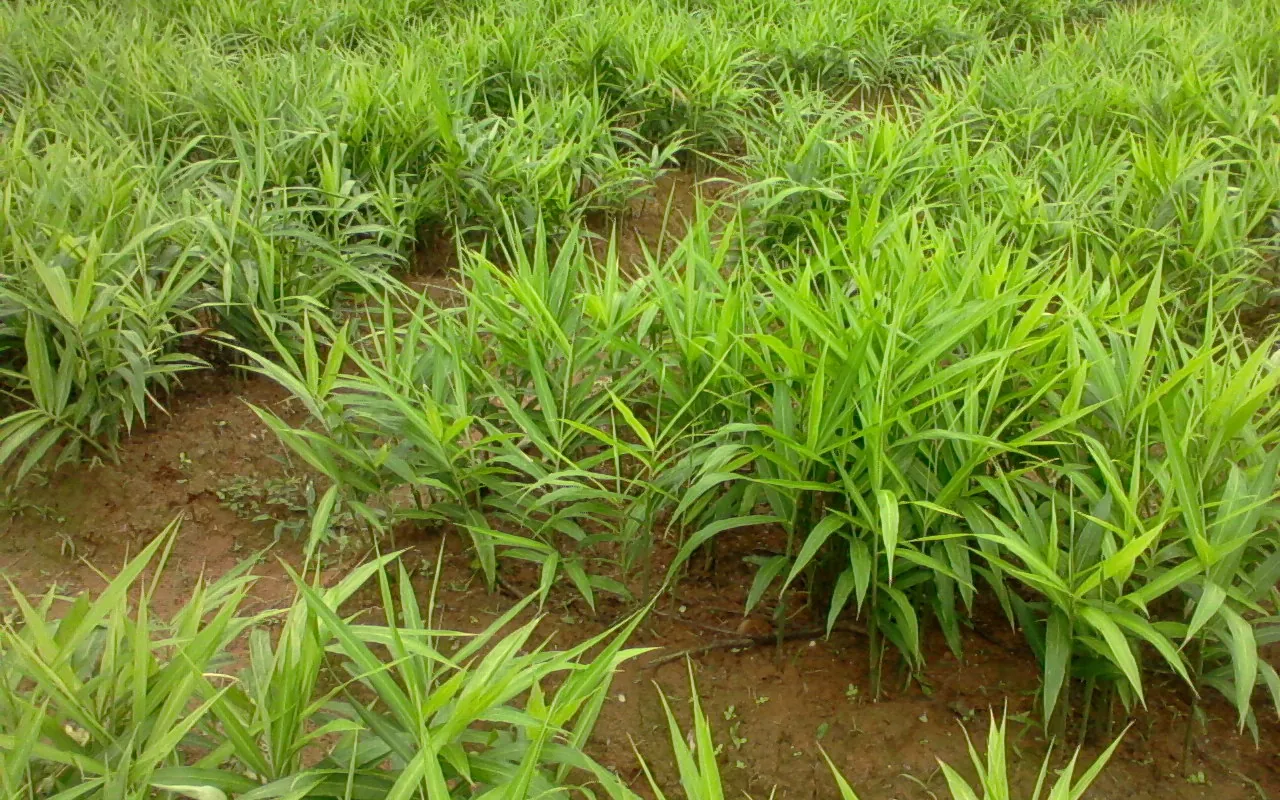
This guide shows how traditional farmers usually plant luya. Use it as a starting point. For a higher yield, update it: plant certified seed or clean planting material, test your soil, and follow the right spacing and fertilizer.
How Filipino farmers usually grow luya from rhizome pieces in furrows, often under coconut or coffee, and dig it eight to ten months later. For upland and backyard growers of native and bigger ginger types who want the usual way and what to change for heavier, cleaner rhizomes.
Before you plant, get the field ready with our land preparation guide for root crops. Then choose your seed or planting material with the luya nutrient deficiency guide.
When to plant luya
Most farmers plant as the rains begin, around April to May, so the young shoots grow on the rains. Where there is water all year, ginger can be planted in any month.
What you plant
Seed rhizomes (binhi), about 800 to 1,500 kg a hectare. Farmers keep good rhizomes in the shade under banana or coconut leaves, then just before planting cut healthy, sprouting ones into pieces with 3 to 4 buds each. Some sprout the pieces first in a raised bed under compost and coconut coir dust.
Paano magtanim ng luya, step by step
The crop is ready about 270 days after planting.
Before planting (Bago magtanim)
14 days before planting: Clear without burning
Clear bushes and old crop stubble. Pile them for compost instead of burning.
7 days before planting: Plow, harrow and open furrows
Plow twice, harrow until fine, and open furrows about 1 m apart. Work rotted chicken manure into the furrows. Make sure rain water drains away.
The nursery (Punlaan)
21 days before planting: Pick and sprout the seed pieces
Choose plump, healthy rhizomes with eyes and cut them into pieces with 3 to 4 buds. For an even stand, line them up close together in a raised bed, cover with compost and coir dust, and water as needed until the sprouts are 1 to 2 cm long.
- Keep the seed ginger shadedFrom harvest until planting, keep the seed rhizomes in a shaded place under a cover of banana or coconut leaves. Look them over now and then and take out any that shrivel, soften or change color.
- Choose mature, healthy handsPick plump rhizomes from plants left to full age, about 9 to 10 months, with no rot, galls or soft spots and with eyes already swelling. Young ginger does not keep or sprout as well.
- Break them into piecesJust before sprouting or planting, break or cut the hands into pieces that each carry 3 to 4 buds or eyes. Use a clean, sharp knife so the cut is smooth.
- Let the cuts dry and sealSpread the fresh pieces in the shade on a clean, dry floor or mat until the cut faces dry and form a thin corky skin. Pieces planted with wet, fresh cuts rot easily in the soil.
- Sprout them in a raised bedFor an even stand, make a raised bed about 1 m wide and 20 cm high. Line the pieces up about 2 cm apart, cover them with a mix of compost and coir dust and water only as needed to keep it damp.
- Move them at the first sproutssprouts about 1 to 2 cmLift the pieces and plant them in the furrows once the sprouts are about 1 to 2 cm long, before they grow long and break in handling.
Planting day (Pagtatanim)
Planting day: Plant the pieces
Lay the sprouted pieces in the furrow about 30 cm apart, buds up, about 5 cm deep, and cover lightly with soil.
Day 1: Mulch
Cover the rows with rice straw or coconut leaves to keep the soil moist and hold back weeds.
Care while it grows (Pag aalaga)
Day 7: Water lightly and often
If the rains are uneven, give light watering every four to seven days during leaf growth.
Day 30: Weed and first side dressing
Hand weed about a month after planting and put the first half of the fertilizer along the rows.
Day 60: Second side dressing and cover the rhizomes
Put the rest of the fertilizer, weed again, and pull soil or mulch over rhizomes that show at the surface.
Day 90: Watch for rot and wilt
Look for yellowing, wilting shoots and soft, smelly rhizomes at the base. Pull out and burn sick plants and do not move soil from those spots.
Day 271: Clean, dry and sort
Trim roots and shoots, wash off the soil, air dry, and sort by size, throwing out rotting pieces. Keep the best rhizomes in the shade for the next planting.
- Trim and wash right awayCut off the shoots and roots soon after harvest. Wash the ginger in clean water, rubbing it gently by hand or with a soft brush so the hands do not break.
- Spread it to dryLay the rhizomes on a clean, dry surface in the shade where air moves, and turn them now and then until the surface water is gone.
- Cure ginger you will keepseveral daysGinger for storage or for seed is left in the open air for several days more, so the skin thickens and every cut seals over. Cured ginger keeps much longer than fresh washed ginger.
- Sort by sizeSort out rotting and damaged pieces first. Buyers who grade ginger usually take large hands over 300 grams, medium ones of 150 to 300 grams and small ones under 150 grams as separate classes.
- Store in deep shadeKeep only clean, healthy rhizomes. Without cold storage, farmers keep them in a well shaded, airy place, with the best hands set aside under leaves as seed for the next planting.
Harvest (Anihan)
Day 270: Dig when the leaves wither
Ginger is ready when the leaves turn yellow and dry, about 8 to 10 months after planting. Dig each hill with a fork or hoe, lift the whole clump, shake off the soil and cut the stems without breaking the rhizomes. Tip: Young ginger for pickling is dug much earlier. Mature ginger for salabat is left the longest.
- Cut the tops first2 to 5 days before diggingA few days before digging, cut off the dry stems and leaves so the skin of the rhizomes hardens in the soil and peels less at harvest.
- Loosen and lift each hillPush a spading fork or hoe in wide of the hill, loosen the soil and pull up the whole clump. Shake off the soil and lay the clumps on top of the bed.
- Trim without breakingCut the stems off close to the rhizomes. Every broken or skinned piece loses weight fast and starts to rot, so handle the clumps gently.
Watering luya, stage by stage
Ginger is mostly a rain crop, planted as the rains begin around April to May so the young shoots grow on the rains, with rice straw or coconut leaves over the rows. Where the rains are uneven, farmers give light, frequent waterings every four to seven days during leaf growth, and they choose fields that never hold standing water. Mostly rain. Where water is near, farmers water by hose, sprinkler or furrow, lightly and often. Water in the morning.
Planting to the first leaves, when the seed pieces need moist soil to sprout. Leaf growth through rhizome filling: no long dry spells and no standing water.
| Stage | When | How often | How much |
|---|---|---|---|
| Sprouting the seed pieces | 21 days before planting to planting day | Water the sprouting bed only as needed to keep the compost cover damp | Damp, never soggy |
| Planting and shoots coming up | Planting day to day 30 | Plant into moist soil with the rains and mulch at once. In a dry week water lightly every four to seven days | Light waterings that moisten the soil under the mulch |
| Leaf growth | Day 30 to 120 | Light, frequent waterings every four to seven days when rain is uneven, closer on sandy soil | Moist, not soaked. Water after each side dressing |
| Rhizomes filling | Day 120 to 240 | Rain is usually enough. Water every four to seven days in a dry spell | Light waterings, never standing water |
| Leaves withering to harvest | Day 240 to 270 | Stop watering as the leaves turn yellow and dry | No water |
Without irrigation. Plant as the rains begin, around April to May, so the young shoots grow on the rains, and mulch the rows right after planting with rice straw or coconut leaves. Pick loose loam that drains easily, never clay that holds water.
In the dry season. Where rain is uneven, give light waterings every four to seven days during leaf growth, closer on sandy soil. Water when the soil under the mulch is dry a finger deep or the leaves roll in the morning, and stop when the leaves start to yellow before harvest.
In the rainy season. Open furrows and make sure rain water drains away. Ginger does not like stagnant water. Soggy ground brings rhizome rot and bacterial wilt, which yellow and collapse the shoots.
- Too little water: Leaves roll and yellow at the tips, new shoots stop coming, and the rhizomes stay thin and fibrous.
- Too much water: Shoots yellow and collapse, the base of the stem goes soft and water soaked, and the rhizomes rot and smell.
To water better for a higher yield: Keep a thick mulch on the rows all season to hold moisture and cut the watering. Water lightly and often in dry spells instead of soaking the field, which brings rot.
Spacing, water and fertilizer for luya
Spacing
Furrows about 1 m apart and seed pieces about 30 cm apart in the row. Under coconut or with other crops the rows are set between the trees.
Water
Mostly rainfed, planted with the rains. Where rain is uneven, farmers water lightly every four to seven days during leaf growth. Ginger rots in soggy ground, so fields must drain well.
Fertilizer
Traditional growers rely on chicken or animal manure, about 3 to 5 tons a hectare, worked into the furrows. Ginger needs a lot of potash. A common guide adds about 11 bags of 14 14 14 and 4 bags of 0 0 60 a hectare, split as side dressings at 30 and 60 days. To read what a bag really gives, see our guide to fertilizer for this crop.
Care and harvest
Care while it grows
Mulching right after planting, hand weeding at a month and then as weeds come, two side dressings, and covering rhizomes that come up to the surface. Ginger takes some shade and is often grown under coconut, coffee or with papaya and pineapple.
When and how to harvest
Most ginger for the local market is dug at 8 to 10 months, when the leaves yellow and wither. Clumps are dug with care, stems cut off, rhizomes trimmed, washed, air dried and sorted. Bruised or broken pieces lose weight and rot faster.
Common mistakes when planting luya
- Planting pieces from rotting or shriveled rhizomes, which spreads rhizome rot.
- Planting in a field that holds water after rain.
- Planting ginger where tomato, pepper or eggplant just grew, or where wilt was seen before.
- Skipping potash, so the rhizomes stay small.
- Breaking and bruising the rhizomes at harvest.
How to get a higher yield of luya
The traditional way gets a crop, but small changes add up. These are the first things to change, one season at a time.
- Use clean, healthy seed rhizomes from a field without rot or wilt, and sprout them before planting.
- Test the soil and fertilize by the result, with enough potash.
- Plant on well drained land and mulch to keep moisture even.
- Rotate with crops outside the tomato family and pull and burn sick plants early.
- Dig at the right age for your buyer and handle rhizomes gently.
anee.io helps with each of these. The NPK Plus calculator checks that your fertilizer plan feeds the yield you want, the pest and disease finders tell you what is on the leaves before you spray, and Anee, the smart farm technician answers your questions in Tagalog or English.
Members open this guide in the How to Plant tool and send every step to the Protocol Builder in one tap, each on its own day. There you can change the seed, the spacing and the fertilizer, then turn it into a cropping calendar for your lots.
Start from the traditional way, make it better, and let anee.io date every task from your own planting day. Free to start.
Start freeQuestions about planting luya
Paano magtanim ng luya?
When do farmers plant luya in the Philippines?
How far apart do you plant luya?
How long before luya can be harvested?
How often do you water luya?
What do you plant to grow luya?
See every step of planting it the traditional way
Register for free to read every step with its day, the spacing, water and fertilizer, the common mistakes and what to change for a higher yield. Then send it to your Protocol Builder in one tap.
Free to register. No credit card. Works on any phone.