Paano Magtanim ng Ampalaya: How to Plant Bitter Gourd the Traditional Way
Paano magtanim ng ampalaya? Here is how traditional Filipino farmers usually plant ampalaya (bitter gourd), step by step from getting the field ready to the harvest, with the day of each step and what to change for a higher yield.
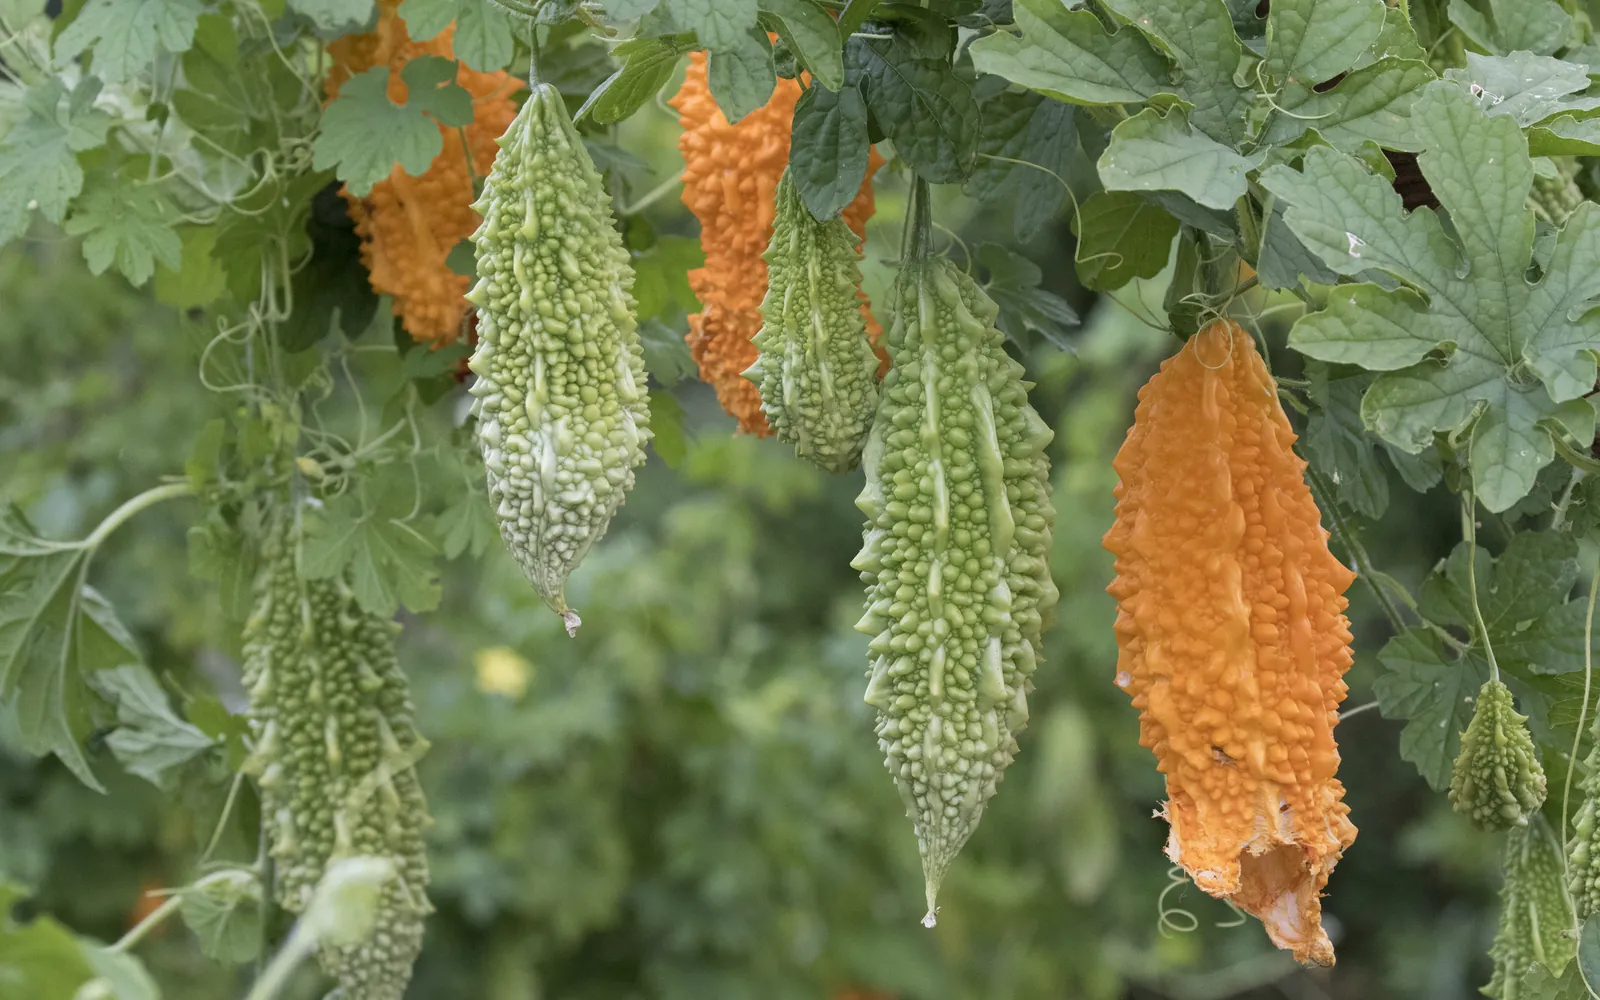
This guide shows how traditional farmers usually plant ampalaya. Use it as a starting point. For a higher yield, update it: plant certified seed or clean planting material, test your soil, and follow the right spacing and fertilizer.
How Filipino farmers grow ampalaya on a trellis, from seed sown straight in the field or from tray seedlings, up to picking two or three times a week. It is for small farms growing ampalaya for its fruits, with the young tops sold as talbos on the side.
Before you plant, get the field ready with our land preparation guide for cucurbits. Then choose your seed or planting material with the ampalaya varieties sold here. If the leaves turn pale later on, the ampalaya nutrient deficiency guide helps you find what is missing. For more on the crop, read pagtatanim ng gulay, vegetables in the Philippines.
When to plant ampalaya
Ampalaya can be planted any month in the lowlands, but most farmers prefer October to February, the cooler and drier months. A wet season crop is planted on raised rows with wider gaps between rows and a drainage canal, because the roots do not stand waterlogging.
What you plant
Seed, about 2 to 3 kg for a hectare. The hard seed is soaked in clean water overnight, then wrapped in a damp cloth for a few days until the seed coat cracks, or the tip is nicked carefully so water gets in. Farmers either drop the sprouted seed straight into the hills or raise one seedling a cell in trays for 7 to 10 days after it comes up.
Paano magtanim ng ampalaya: seed sown in the field
This is the seed sown in the field way (Seed sown in the field (tanim buto)). The first fruits come about 45 to 75 days after sowing, depending on the variety. Picking then goes on two or three times a week for 2 to 3 months. The crop is ready about 60 days after sowing.
Seed sown in the field: before planting (Bago magtanim)
21 days before sowing: Plow and harrow the field
Plow 15 to 20 cm deep and harrow two or three times, about a week apart, until the soil is loose and level.
14 days before sowing: Lime and manure
On acid soil spread agricultural lime or dolomite after the first plowing. About two weeks before planting, work in compost or dried chicken manure, 2 tons or more for a hectare.
4 days before sowing: Soak and sprout the seed
Soak the seed overnight, drain it and wrap it in a damp cloth in a shaded place. Plant the seeds once the coat cracks and a small root shows, usually after 3 to 4 days.
- Soak overnightovernightPut the seed in clean water and leave it overnight so the hard shell softens.
- Nick very hard seedIf the shell is very hard, carefully nick the tip of the shell with a sharp knife, without cutting into the white kernel inside, so water gets in faster.
- Wrap it in a damp clothDrain the seed, wrap it in a damp cloth or sack and keep it in a shaded place. Sprinkle the cloth when it starts to dry, but do not let water stand in it.
- Check every day3 to 4 daysOpen the cloth each day. The seed is ready when the shell cracks and a small white root shows, usually in 3 to 4 days.
- Plant before the root grows longPlant the sprouted seed right away, root down, handling it gently. A long root breaks easily and the seedling then comes up weak or not at all.
1 day before sowing: Open the furrows
Make furrows about 2 meters apart in the dry season and about 3 meters apart in the wet season, with a canal at the low end to drain the rain.
Seed sown in the field: planting day (Pagtatanim)
Sowing day: Plant the sprouted seed
Mix about a tablespoon of 14 14 14 into the soil of each hill, then plant one or two sprouted seeds a hill, about 30 cm apart along the furrow. Cover with fine soil and water.
Seed sown in the field: care while it grows (Pag aalaga)
Day 7: Fill gaps and thin
Replant hills where nothing came up. Where two plants grew, keep the stronger one or both if they are healthy.
Day 7: Water by the furrows
When the soil dries, let water into the furrows until it soaks the rows. One good soaking lasts about a week. Never leave water standing.
Day 9: Off bar and weed
About 7 to 10 days after planting, plow or hoe the soil away from the rows to kill young weeds.
Day 12: Put up the trellis
When the vines are about 15 cm tall, set bamboo, ipil ipil or kakawate posts about every 3 meters and build either an A frame or a flat roof about 1.5 to 2 meters high. Stretch wire or nylon across the top and tie a string from each hill up to it. Tip: Do not wait until the vines sprawl. Tangled vines break when you lift them.
- Start earlyPut the trellis up while the vines are still about 15 cm tall, before they start to run on the ground and tangle.
- Set the postsSet bamboo, ipil ipil or kakawate posts about every 3 meters along the rows. Build the frame about 2.5 to 3 meters wide and 1.5 to 2 meters high, as long as the field.
- Choose an A frame or a flat roofAn A frame leans the posts of two rows together at the top like a tent. A flat roof, or table type, keeps the top level over the rows. Both work, and many farmers say ampalaya does best on the A frame.
- Lay the topTie bamboo crosspieces along the top and weave tie wire or nylon across them so the vines have a net to spread on. An old fishing net stretched over the top does the same job.
- Give each hill a stringDrive a short stake about 12 inches long beside each seedling and tie a wire, nylon or plastic string from the top of the trellis down to it. The young vine climbs the string up to the roof.
Day 18: Hill up
Between 15 and 20 days after planting, plow or hoe the soil back against the rows and pull the weeds left at the base.
Day 24: First side dressing
Three to four weeks after planting, put about a tablespoon of urea at each hill, a hand span from the stem, and cover it with soil. Repeat every two weeks two or three more times, adding muriate of potash once the vines start to fruit.
Day 25: Train the vines and prune the base
Tie the vines to the strings so they climb. Pinch off side shoots on the lower part of the vine when they are about a foot long, and strip old leaves near the ground, so the plant fruits up on the trellis. Tip: The pinched tops can be sold or cooked as talbos.
Day 45: Bag the young fruits
As soon as the petals drop, wrap each young fruit in a paper or plastic bag so fruit flies cannot lay eggs in it. Pick up stung, yellowing fruits and bury them, and remove leaves with yellow spots.
Seed sown in the field: harvest (Anihan)
Day 60: Pick the green fruits
Pick fruits that are full size, green and glossy, while the seeds are still soft, about 15 to 20 days after the flower opened. Hold the fruit and cut the stalk with a sharp knife, two or three times a week.
Day 61: Sort and pack
Sort by size and set aside damaged fruits. Pack them in a kaing lined with fresh banana leaves on the sides and bottom so they do not bruise.
Day 61: Keep seed from ripe fruits
Growers of open pollinated ampalaya keep their own seed by leaving some fruits on the best vines to ripen fully, then cleaning, drying and storing the seed.
- Leave seed fruits to ripenChoose healthy, heavy bearing vines that are true to the variety. Leave a few well shaped fruits on them past the green stage until they are fully ripe.
- Rest the picked fruits4 to 6 daysKeep the ripe fruits in the shade for a few days after picking. This loosens the slimy pulp around the seed so it comes away easily.
- Slice, scrape and washSlice each fruit along its length, scrape out the seed and wash it in water, rubbing off the red pulp until the seed is clean.
- Air dry, then sun dryat least 3 days in the shade, then up to 5 days in the sunSpread the seed on a screen or put it in a net bag and dry it in the shade, where air moves, for at least three days. Then finish it in the sun for up to five days.
- Store it dry and coolKeep the dry seed in sealed plastic bags or glass jars, labeled with the variety and date, in a cool, dry place.
Tray seedlings transplanted, step by step
This is the tray seedlings transplanted way (Tray seedlings transplanted (lipat tanim)). Seedlings go out about 15 days after sowing. Early hybrids give the first fruits about 45 to 60 days after transplanting and later kinds near 70 days. The crop is ready about 50 days after transplanting.
Tray seedlings transplanted: before planting (Bago magtanim)
21 days before transplanting: Plow and harrow the field
Plow 15 to 20 cm deep and harrow two or three times, about a week apart, until the soil is loose and level.
14 days before transplanting: Lime and manure
On acid soil spread lime or dolomite after the first plowing. Work in compost or dried chicken manure, 2 tons or more for a hectare, about two weeks before transplanting.
1 day before transplanting: Open the furrows
Make furrows about 2 meters apart in the dry season and about 3 meters apart in the wet season, with a canal to drain the rain.
Tray seedlings transplanted: the nursery (Punlaan)
15 days before transplanting: Sow in trays
Soak the seed overnight. Fill trays with equal parts garden soil, burnt rice hull and compost, and sow one seed a cell. Keep the trays in light shade and water in the morning.
4 days before transplanting: Harden the seedlings
Put the trays in full sun a little longer each day and water less often, so the seedlings are tough by planting day.
Tray seedlings transplanted: planting day (Pagtatanim)
Transplanting day: Transplant in the late afternoon
Set out the seedlings once they have true leaves, about 15 days from sowing, one a hill about 30 cm apart along the furrow. Mix a tablespoon of 14 14 14 into each hill first, plant with the root ball whole and water right away. Tip: Do not keep the seedlings in the trays too long. Old seedlings grow poorly and many die.
Tray seedlings transplanted: care while it grows (Pag aalaga)
Day 4: Replant missing hills
Replace seedlings that died within the first few days with spares from the trays.
Day 7: Water and off bar
Let water into the furrows when the soil dries, about once a week, and drain it off. Around 7 to 10 days after planting, hoe the soil away from the rows to kill young weeds.
Day 10: Put up the trellis
When the vines are about 15 cm tall, build an A frame or a flat roof about 1.5 to 2 meters high on bamboo, ipil ipil or kakawate posts about every 3 meters. Run wire or nylon across the top and a string from each hill up to it.
- Start earlyPut the trellis up while the vines are still about 15 cm tall, before they start to run on the ground and tangle.
- Set the postsSet bamboo, ipil ipil or kakawate posts about every 3 meters along the rows. Build the frame about 2.5 to 3 meters wide and 1.5 to 2 meters high, as long as the field.
- Choose an A frame or a flat roofAn A frame leans the posts of two rows together at the top like a tent. A flat roof, or table type, keeps the top level over the rows. Both work, and many farmers say ampalaya does best on the A frame.
- Lay the topTie bamboo crosspieces along the top and weave tie wire or nylon across them so the vines have a net to spread on. An old fishing net stretched over the top does the same job.
- Give each hill a stringDrive a short stake about 12 inches long beside each seedling and tie a wire, nylon or plastic string from the top of the trellis down to it. The young vine climbs the string up to the roof.
Day 14: Train the vines and prune the base
About two weeks after transplanting, tie the vines to their strings and pinch off the low side shoots and old leaves near the ground. Keep doing this as the vines climb.
Day 16: Hill up
Hoe the soil back against the rows and pull the weeds left at the base of the plants.
Day 21: Side dressing every two weeks
Put about a tablespoon of urea at each hill and cover it, three weeks after transplanting. Repeat every two weeks two or three more times, adding muriate of potash once fruiting starts.
Day 35: Bag the young fruits
Wrap each young fruit in paper or a plastic bag once the petals drop. Bury fruits that turn yellow with holes and remove leaves with yellow spots.
Tray seedlings transplanted: harvest (Anihan)
Day 50: Pick the green fruits
Pick full size, green, glossy fruits with soft seeds, cutting the stalk with a sharp knife. Go through the field two or three times a week.
Day 51: Sort and pack
Sort by size, take out damaged fruits and pack the rest in a kaing lined with fresh banana leaves.
Day 51: Keep seed from ripe fruits
Growers of open pollinated ampalaya keep their own seed by leaving some fruits on the best vines to ripen fully, then cleaning, drying and storing the seed.
- Leave seed fruits to ripenChoose healthy, heavy bearing vines that are true to the variety. Leave a few well shaped fruits on them past the green stage until they are fully ripe.
- Rest the picked fruits4 to 6 daysKeep the ripe fruits in the shade for a few days after picking. This loosens the slimy pulp around the seed so it comes away easily.
- Slice, scrape and washSlice each fruit along its length, scrape out the seed and wash it in water, rubbing off the red pulp until the seed is clean.
- Air dry, then sun dryat least 3 days in the shade, then up to 5 days in the sunSpread the seed on a screen or put it in a net bag and dry it in the shade, where air moves, for at least three days. Then finish it in the sun for up to five days.
- Store it dry and coolKeep the dry seed in sealed plastic bags or glass jars, labeled with the variety and date, in a cool, dry place.
Watering ampalaya, stage by stage
Seed sown in the field: how to water
Ampalaya sown straight in the field is watered through the furrows beside the rows: water is let in when the soil dries, soaks the rows and is drained off, and one good soaking lasts about a week. In the hot months and once picking starts, many farmers water about twice a week. Furrow watering is the usual way: water is let into the furrow beside the rows, soaks in, and the rest is drained off. Small growers water each hill with a can or a hose, and some commercial farms use drip lines. Water in the early morning or late afternoon.
Sowing or transplanting to the first true leaves: the hills must stay moist. Flowering and fruit set: dry soil now drops the flowers and makes short, crooked fruits. The whole picking season: dry spells cut the number of fruits, and standing water rots the roots.
| Stage | When | How often | How much |
|---|---|---|---|
| Sprouting the seed | 4 days before sowing to sowing day | Keep the cloth with the soaked seed damp in the shade until the coat cracks | Damp, not dripping |
| Sowing to first leaves | Sowing day to day 7 | Water the hills right after planting, then by can every day or two if no rain falls | Moisten each hill without washing the seed out |
| Vines climbing the trellis | Day 7 to 35 | Furrow water when the soil dries, about once a week. Twice a week on sandy soil or in the hot months. Water after the side dressing | Let water run until the rows are soaked, then drain. Never leave it standing |
| Flowering and fruit set | Day 35 to 60 | Keep the soil steadily moist, about twice a week in dry, hot weather | A full furrow soaking each time, drained off |
| Picking | Day 60 to 135 | Keep watering about once or twice a week, by the soil, through the two to three months of picking. Water after each feeding | A full furrow soaking each time, drained off |
Without irrigation. Most farmers plant ampalaya in the cooler, drier months from October to February where a canal, well or pump is near, because the vines need water through months of picking. A rain fed crop goes in at the start of the rains on raised rows with a drain canal, with rice straw or cut grass laid along the rows to hold the moisture between rains.
In the dry season. Let water into the furrows when the soil dries. One good soaking lasts about a week on loam, but on sandy soil and in the hot months water about twice a week, mostly from flowering on. Water when the leaves droop by mid morning, the vine tips stop growing, or the soil a few cm down feels dry, and water again after each side dressing.
In the rainy season. Use raised rows set about 3 meters apart, with a canal at the low end to carry the rain away. Ampalaya cannot stand waterlogging: the roots rot and the vines wilt and yellow. Skip the furrow watering when the rains are steady.
- Too little water: Leaves droop and turn dull, the vine tips stop running, flowers drop, and the fruits come out short, crooked and pale.
- Too much water: Leaves yellow from the base up, vines wilt even in wet soil, the root and stem base rot, and young fruits fall.
To water better for a higher yield: A drip line along the row under straw or plastic mulch gives the steady water ampalaya needs during months of picking, with far less water and fewer weeds. Water right after each side dressing so the fertilizer dissolves and reaches the roots.
Tray seedlings transplanted: how to water
Transplanted ampalaya is watered right after setting out and then through the furrows beside the rows about once a week, when the soil dries, with the water drained off after it soaks in. In the hot months and once picking starts, many farmers water about twice a week. Furrow watering is the usual way: water is let into the furrow beside the rows, soaks in, and the rest is drained off. Small growers water each hill with a can or a hose, and some commercial farms use drip lines. Water in the early morning or late afternoon.
Sowing or transplanting to the first true leaves: the hills must stay moist. Flowering and fruit set: dry soil now drops the flowers and makes short, crooked fruits. The whole picking season: dry spells cut the number of fruits, and standing water rots the roots.
| Stage | When | How often | How much |
|---|---|---|---|
| Seedlings in trays | 15 to 4 days before transplanting | Water the trays every morning in light shade | Enough to moisten the cells, never soggy |
| Hardening | 4 days before transplanting to transplanting day | Water less often while the trays get more sun | Light waterings. Water at once if they wilt hard |
| Transplanting and settling | Transplanting day to day 7 | Water each hill right after setting out the seedlings, then by can every day or two if no rain falls | Soak the soil around each root ball |
| Vines climbing the trellis | Day 7 to 30 | Furrow water when the soil dries, about once a week. Twice a week on sandy soil or in the hot months. Water after each side dressing | Let water run until the rows are soaked, then drain. Never leave it standing |
| Flowering and fruit set | Day 30 to 50 | Keep the soil steadily moist, about twice a week in dry, hot weather | A full furrow soaking each time, drained off |
| Picking | Day 50 to 125 | Keep watering about once or twice a week, by the soil, through the two to three months of picking. Water after each feeding | A full furrow soaking each time, drained off |
Without irrigation. Most farmers plant ampalaya in the cooler, drier months from October to February where a canal, well or pump is near, because the vines need water through months of picking. A rain fed crop goes in at the start of the rains on raised rows with a drain canal, with rice straw or cut grass laid along the rows to hold the moisture between rains.
In the dry season. Let water into the furrows when the soil dries. One good soaking lasts about a week on loam, but on sandy soil and in the hot months water about twice a week, mostly from flowering on. Water when the leaves droop by mid morning, the vine tips stop growing, or the soil a few cm down feels dry, and water again after each side dressing.
In the rainy season. Use raised rows set about 3 meters apart, with a canal at the low end to carry the rain away. Ampalaya cannot stand waterlogging: the roots rot and the vines wilt and yellow. Skip the furrow watering when the rains are steady.
- Too little water: Leaves droop and turn dull, the vine tips stop running, flowers drop, and the fruits come out short, crooked and pale.
- Too much water: Leaves yellow from the base up, vines wilt even in wet soil, the root and stem base rot, and young fruits fall.
To water better for a higher yield: A drip line along the row under straw or plastic mulch gives the steady water ampalaya needs during months of picking, with far less water and fewer weeds. Water right after each side dressing so the fertilizer dissolves and reaches the roots.
Spacing, water and fertilizer for ampalaya
Spacing
Rows about 2 meters apart in the dry season and up to 3 meters in the wet season, with hills about 30 cm apart along the row for a string trellis, one or two plants a hill. On an A frame trellis some farmers use rows about 1.5 meters apart with hills about 75 cm apart.
Water
Ampalaya needs steady moisture but cannot stand waterlogging. Farmers let water into the furrows between rows when the soil dries, and one good soaking lasts about a week. In the wet season a drainage canal carries the rain away.
Fertilizer
Lime or dolomite on acid soil after the first plowing, and 2 tons or more of compost or dried chicken manure a hectare two weeks before planting. About a tablespoon of 14 14 14 in each hill at planting, then about a tablespoon of urea a hill at 3 to 4 weeks, repeated every two weeks two or three more times, with muriate of potash added once the vines fruit. To read what a bag really gives, see our guide to fertilizer for this crop.
Care and harvest
Care while it grows
The trellis is the big job: an A frame or a flat roof of wire or nylon about 1.5 to 2 meters high on bamboo, ipil ipil or kakawate posts, with a string from each hill. Vines are tied to the strings, low side shoots and old leaves are taken off so the plant fruits on top, and the tops are sold as talbos. Off barring at about 7 to 10 days and hilling up at 15 to 20 days. Young fruits are wrapped in paper or plastic against fruit fly, and some farmers plant marigold or citronella around the field.
When and how to harvest
Fruits are ready about 15 to 20 days after the flower opens, or 45 to 75 days after planting depending on the variety. They are picked full size, green and glossy with soft seeds, by cutting the stalk with a knife, two or three times a week for 2 to 3 months. They are sorted and packed in a kaing lined with fresh banana leaves. Fruits for seed are left to ripen and kept a few days before the seeds are taken out.
Common mistakes when planting ampalaya
- Putting up the trellis late, so the vines tangle on the ground and the fruits curl or rot.
- Leaving young fruits unbagged and stung fruits lying in the field, so fruit flies multiply.
- Letting fruits turn yellow on the vine, which slows down new fruits.
- Planting on low ground with no drainage in the rainy months, so the roots rot.
- Keeping tray seedlings too long before transplanting, so they grow poorly and many die.
- Leaving the base of the vine crowded with shoots and old leaves, which invites downy mildew.
How to get a higher yield of ampalaya
The traditional way gets a crop, but small changes add up. These are the first things to change, one season at a time.
- Have the soil tested and lime to bring it near pH 5.5 to 6.7. Feed by the result.
- Buy good seed of a variety tolerant to downy mildew and virus, suited to your season.
- Use raised beds with plastic mulch to save weeding and keep the fruits clean.
- Fight fruit fly as a whole field: bag every young fruit, hang fruit fly traps and bury stung fruits each week.
- Rotate away from other gourds such as squash, cucumber, patola and upo.
- Keep side dressing in small doses through the picking months, with enough potash.
anee.io helps with each of these. The NPK Plus calculator checks that your fertilizer plan feeds the yield you want, the pest and disease finders tell you what is on the leaves before you spray, and Anee, the smart farm technician answers your questions in Tagalog or English.
Members open this guide in the How to Plant tool and send every step to the Protocol Builder in one tap, each on its own day. There you can change the seed, the spacing and the fertilizer, then turn it into a cropping calendar for your lots.
Start from the traditional way, make it better, and let anee.io date every task from your own planting day. Free to start.
Start freeQuestions about planting ampalaya
Paano magtanim ng ampalaya?
When do farmers plant ampalaya in the Philippines?
How far apart do you plant ampalaya?
How long before ampalaya can be harvested?
How often do you water ampalaya?
What do you plant to grow ampalaya?
See every step of planting it the traditional way
Register for free to read every step with its day, the spacing, water and fertilizer, the common mistakes and what to change for a higher yield. Then send it to your Protocol Builder in one tap.
Free to register. No credit card. Works on any phone.